How to Poach an Egg: The Foolproof No-Fail Technique
The water temperature, the pre-crack method, why the swirl usually fails, and how to poach eight eggs at once
Poached eggs have a reputation for being difficult. It is an unfair reputation - a poached egg is not technically difficult, it just requires understanding two specific things: the correct water temperature, and why the traditional swirl method usually produces a chaotic, streaming white rather than the clean, compact oval that makes a poached egg worth eating.
This guide fixes both issues. The water temperature is precise and achievable on any hob without a thermometer. The pre-crack method is an alternative to the swirl that consistently produces better results for home cooks. The make-ahead technique makes poached eggs for a crowd entirely achievable. And the science of egg white coagulation explains why every instruction in this post exists.
The Science: Why Temperature Is Everything
Egg white is approximately 90% water and 10% protein. When heated, these proteins unfold and bond to each other - a process called coagulation - forming the solid white of a set egg. The temperature at which this occurs is the key variable:
- Egg white begins to coagulate at approximately 62°C - at this temperature, the proteins are setting into a tender, barely-firm gel
- Egg white is fully coagulated and firm at approximately 70°C
- Egg yolk begins to coagulate at approximately 65°C and is fully set at approximately 70°C
The target for a poached egg with a set white and a runny yolk:
The water must be hot enough to set the white (62-70°C range) but not so hot that it agitates the egg violently (boiling at 100°C) - the vigorous bubbling of a full boil breaks apart the partially set white before it can hold together.
The correct water temperature: a gentle simmer - small bubbles breaking the surface without vigorous rolling. Approximately 80-85°C. At this temperature, the white sets gradually, the yolk stays liquid, and there is no agitation to break the egg apart.
Does the Swirl Actually Work?
The swirl method - creating a vortex in the water before lowering the egg - is the most commonly given instruction for poached eggs. The theory: the vortex wraps the white around the yolk as it enters the water, producing a compact, oval result.
The reality for home cooks: The swirl is effective in professional kitchens where it is performed constantly with practised speed and where shallow hotel pans allow the egg to travel directly to the centre of the vortex. In a home saucepan, the vortex dissipates in seconds, the egg often enters off-centre, and the result is frequently a trailing white that spirals outward rather than wrapping around the yolk.
The alternative: The pre-crack method. Crack each egg into an individual ramekin or small cup before adding to the water. Lower the ramekin to just above the water's surface and tip the egg in gently. No swirl. No vortex. The egg settles to the base of the pan, the white gradually sets around the yolk, and the result is compact and clean.
When the swirl does help: In fresh eggs, the white is dense and more cohesive - the swirl does help slightly. In older eggs, the white is thin and liquid - the swirl makes no meaningful difference. If your eggs are very fresh, try both methods. For older eggs, skip the swirl entirely.
The Vinegar Question
Many poached egg recipes add vinegar to the water - the theory being that the acidity accelerates white coagulation and produces a more compact result.
The evidence: The acid does slightly accelerate coagulation at the edges of the egg, potentially producing a marginally tidier result. The reality: The difference is small and undetectable in a finished egg. The vinegar taste is undetectable at 1 tablespoon per litre of water. Vinegar in the poaching water is a harmless addition, not a significant improvement.
Recommendation: Skip the vinegar. The improvement is minimal; the extra variable is unnecessary. Focus on temperature and the pre-crack method.
The Foolproof Method
Makes 1-4 poached eggs | Active time: 5 minutes
Equipment
- A wide, deep saucepan (a deeper pan allows the egg to drop gently before hitting the base; a shallow pan causes the egg to hit the base with more force before the white has set around the yolk)
- Individual ramekins or small cups - one per egg
- A slotted spoon
- Kitchen paper for draining
Ingredients
- Eggs - the fresher the better. Fresh egg whites are more cohesive and produce a more compact poached egg. Older eggs produce more trailing whites.
- Water - enough to fill the pan to 8-10cm depth
- Salt - 1 tsp per litre of water
Method
Step 1 - Prepare the eggs: Crack each egg individually into a small ramekin or cup. Check for shell fragments.
Step 2 - Bring the water to a simmer: Fill the saucepan with 8-10cm of water. Add salt. Bring to a full boil over high heat. Then reduce to a gentle simmer - small bubbles at the base of the pan breaking the surface intermittently, with no vigorous rolling. This is approximately 80-85°C.
Visual test for correct temperature: The water should have small bubbles continuously rising from the base and occasionally breaking the surface. If the water is aggressively bubbling or rolling: too hot, reduce further. If completely still with no bubbles: too cool, increase slightly.
Step 3 - Add the eggs: Lower the ramekin to just above the water's surface - the rim of the ramekin should almost touch the water. Tip the egg in gently. The egg will sink, the white will billow slightly, then gradually settle and begin to set.
Add up to 3-4 eggs to the pan simultaneously, spacing them around the pan. More than 4 drops the water temperature significantly.
Do not stir or move the eggs for the first minute - the white is setting and any movement will tear it before it has cohesion.
Step 4 - Time the cook:
- Runny yolk, just-set white: 3-3.5 minutes
- Medium yolk (slightly jammy), fully set white: 4 minutes
- Fully set yolk: 5 minutes
These timings assume large eggs and a correctly tempered simmer. Adjust by 30 seconds for medium eggs.
Step 5 - Remove and drain: Lift each egg with a slotted spoon. Hold over the pan to allow excess water to drain. Transfer to a folded piece of kitchen paper to blot any remaining moisture.
Optional - trim the edges: For the tidiest presentation, use scissors or a small knife to trim any trailing white edges. This is done at restaurants; it is optional at home.
Step 6 - Serve immediately, or hold in ice water for the make-ahead method.
The Make-Ahead Method (For Feeding Multiple People)
This is the professional kitchen technique that makes serving poached eggs to multiple people achievable.
Method:
- Poach the eggs to slightly underdone - 2.5-3 minutes (the white should be just set but the egg still quite soft overall)
- Transfer immediately to a bowl of ice water. The cold water stops the cooking instantly.
- The eggs can be stored in the ice water in the refrigerator for up to 24 hours
To reheat: Bring a bowl of hot water (80°C - the same simmer temperature) and hold the eggs in it for 60-90 seconds until warmed through. Do not leave longer or the yolk will set further. Drain and serve.
This technique makes Eggs Benedict for 8 entirely achievable - poach all 8 eggs the night before, reheat to order the next morning.
Applications
Eggs Benedict: Toasted English muffin, back bacon or smoked salmon, poached egg, hollandaise sauce. The canonical brunch application. The hollandaise requires an emulsification technique - the yolk-and-butter emulsion that is the most technically demanding sauce in Western cooking.
Shakshuka: Poached eggs in a spiced tomato and pepper sauce - the One-Pan collection's Shakshuka recipe uses eggs cooked in sauce (a similar principle to poaching). The poaching technique here applies when eggs are cooked separately.
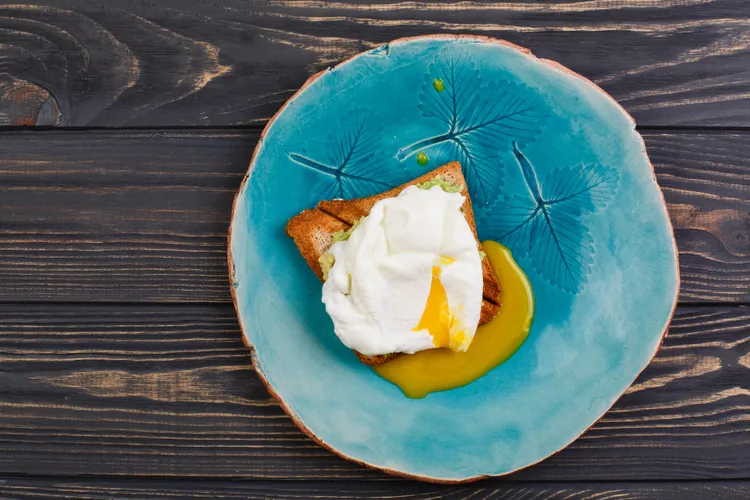
Poached egg on toast with avocado: The simplest application and one of the best. Toast, ripe avocado mashed with lemon and salt, a poached egg, flaky salt and black pepper, a few chili flakes.
On grain bowls, salads, and soups: A poached egg added to any warm grain bowl, salad, or light soup adds protein, richness, and the specific pleasure of breaking the yolk over the other ingredients.
Troubleshooting
The white is trailing and wispy: The egg was not fresh enough (thin white), the water was too hot (agitation before the white could set), or the egg was added to the water with too much force. Use fresher eggs; reduce the water temperature; lower the ramekin closer to the water surface before tipping.
The white is rubbery: Over-cooked. Reduce the cooking time by 30-45 seconds.
The yolk is fully set: Over-cooked. Reduce by 30-45 seconds, or check that the water isn't too hot (hotter water cooks more quickly).
The egg is sticking to the base of the pan: Insufficient water depth - the egg hit the base before the white could set around the yolk. Use a deeper pan or more water.
The white separated from the yolk: The egg was very old (watery white that cannot hold together), or the water was aggressively boiling. Use fresh eggs; reduce water temperature to a true simmer.
Pro Tips
- Fresh eggs make a visible difference. An egg laid within 48 hours produces a thick, cohesive white that poaches compactly. A 10-day-old egg produces a thin, liquid white that trails and loses itself in the water. For poached eggs specifically, freshness matters more than for any other preparation. Buy from a farm shop, farmers' market, or the freshest supermarket eggs available.
- The ramekin is not optional. Cracking an egg directly into the simmering water adds height (the egg falls further) and reduces control (you cannot guide the egg's entry angle). The ramekin eliminates both problems in one step.
- Salt the water. Salt slightly raises the boiling point of water (minimally) but more importantly it seasons the egg. An unsalted poached egg tastes noticeably flat against buttered toast.
- A wide pan is better than a deep one for multiple eggs. Multiple eggs poaching in a deep, narrow pan cluster together and stick. A wide, shallow pan (a sauté pan or even a large frying pan with 8cm of water) allows more spacing.
Common Mistake: Boiling Rather Than Simmering A full rolling boil aggressively churns the water and tears the partially set egg white before it can form a cohesive structure. The result: a cloud of cooked egg white surrounding a yolk rather than a compact, oval poached egg. Reduce the water to a genuine simmer - small bubbles, no rolling agitation - before any egg goes in. If the water returns to a boil after the egg is added, reduce the heat immediately.
FAQ
Q: Can I poach eggs without a saucepan - in a frying pan, for example?
Yes - a wide frying pan with 5-6cm of water works very well. The shallower water means the egg hits the base more quickly, but if the water is at the correct temperature, the white begins to set on contact. Many home cooks find a frying pan produces more compact eggs than a saucepan precisely because the egg doesn't travel as far before it settles.
Q: What is the white film that sometimes forms on poached eggs?
The white film over a poached egg's surface is coagulated egg white - the same material as the egg itself, on the outer surface. It is harmless and normal. If it is very thick, the water was slightly too hot or the egg cooked slightly too long. It does not affect the flavour.
Q: Are poached eggs safe to eat if the yolk is runny?
A poached egg with a runny yolk (3-3.5 minutes) is considered safe for healthy adults. At these temperatures, the white has fully coagulated (70°C+) while the yolk remains liquid (below 65°C). The risk is minimal for fresh eggs from reputable producers; immunocompromised individuals, pregnant women, and young children are advised to eat fully set eggs.
🔗 Continue Learning
Latest