Milk Kefir: Thicker Than Yogurt, Better for Your Gut
The most probiotic-rich fermented dairy food you can make at home - and easier than yogurt
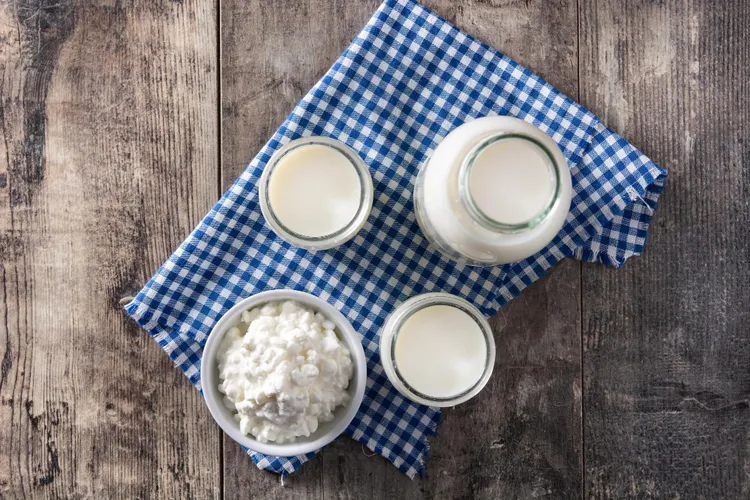
Yogurt is the fermented dairy food most people know. Kefir is the one most worth knowing.
The distinction matters. Yogurt is fermented by two bacterial strains - Streptococcus thermophilus and Lactobacillus bulgaricus - that produce a mild, predictable tang. Milk kefir is fermented by a community of 30-50 different bacterial and yeast species living in the kefir grains - a microbial diversity that produces a more complex, more tangy drink with a nutritional and probiotic profile that yogurt cannot match.
The practical difference is also significant. Yogurt requires precise temperature management - the 40-45°C incubation window is narrow and unforgiving. Milk kefir requires no heat at all. You add grains to milk, leave it at room temperature for 24 hours, strain, and drink. The grains are the technology; your job is simply to provide them with fresh milk on a regular schedule.
What you get: a thick, pourable, slightly effervescent drink with a deep tang, a complex flavour that develops across each 24-hour cycle, and the most diverse community of live beneficial organisms of any food in this collection. The research on kefir's specific health benefits is among the strongest for any fermented food - see The Gut Health Connection for the detail.
📖 Milk kefir grains are different from water kefir grains. They are not interchangeable - milk kefir grains ferment dairy; water kefir grains ferment sugar water. Each is specific to its medium. If you want both, you need both sets of grains. See Water Kefir: The Fizzy Probiotic Drink You Can Make in 48 Hours for the water kefir guide.
What Milk Kefir Grains Actually Are
Milk kefir grains are a SCOBY - a Symbiotic Culture Of Bacteria and Yeast - in the form of white or off-white, cauliflower-like clusters. They feel slightly rubbery and slightly gelatinous, and they grow with each fermentation cycle as the bacteria produce more of the polysaccharide matrix (primarily kefiran) that holds the community together.
The community inside the grains includes approximately:
- 20-30 bacterial species: primarily Lactobacillus kefiranofaciens, Lactobacillus kefiri, Leuconostoc mesenteroides, and various Lactococcus and Streptococcus species
- 5-10 yeast species: primarily Kluyveromyces marxianus, Saccharomyces cerevisiae, and Kazachstania unispora
The bacteria produce lactic acid (the tang) and kefiran (the matrix). The yeasts produce small amounts of CO2 (the slight effervescence) and ethanol (typically less than 1%). Together, they produce a drink with a distinctly different flavour and microbial profile from any single-strain fermented dairy.
The kefiran specifically: Kefiran - the polysaccharide produced by Lactobacillus kefiranofaciens - has been shown in laboratory studies to have anti-inflammatory and antimicrobial properties. It is unique to kefir and is not found in yogurt or other fermented dairy foods.
Where to get grains: Online suppliers (search "milk kefir grains"), fermentation communities, and other home fermenters. Dried grains are available from Amazon and specialist retailers - they require a few days of rehydration in fresh milk before reaching full activity.
Ingredients
Makes 500ml kefir per cycle | Active time: 5 minutes | Fermentation: 24 hours
- 500ml whole full-fat milk - the fat content produces the creamiest, richest kefir. Semi-skimmed works but produces a thinner result. UHT (ultra-heat-treated) milk works but may produce a slightly slower ferment initially.
- 1 tbsp active milk kefir grains (approximately 10-15g) - the starter culture
That is the complete ingredient list. No salt, no sugar, no starter.
Equipment
- 500ml-1 litre glass jar
- Fine-mesh strainer (plastic or stainless steel - avoid reactive metals)
- Loose cover - muslin, coffee filter, or loose-fitting lid
- Non-metal spoon or spatula for handling grains
Method
Step 1: Add grains to milk
Place the kefir grains in a clean glass jar. Pour the milk over the grains. The ratio is important: approximately 1 tbsp of grains per 500ml of milk. Too many grains per unit of milk produces over-fermented, very sour kefir; too few produces under-fermented, mild kefir.
Stir gently with a non-metal spoon.
Step 2: Cover and ferment
Cover the jar loosely - the kefir needs to breathe but needs protection from debris. A coffee filter secured with a rubber band is ideal.
Leave at room temperature (20-24°C) for 18-24 hours.
The visual and smell indicators:
- After 12 hours: the milk thickens slightly and a faintly tangy smell begins to develop
- After 18 hours: visibly thickened, clearly tangy smell, slight effervescence when stirred
- After 24 hours: thick, pourable consistency, pronounced tang, pleasantly sour smell
Taste at 18-24 hours: The kefir is ready when it has thickened to a pourable consistency (similar to drinkable yogurt or buttermilk) and tastes pleasantly sour. If it is still quite sweet and thin at 24 hours, leave for an additional 6 hours.
Step 3: Strain and separate the grains
Pour the fermented kefir through a fine-mesh strainer into a clean bowl or jar. Use a non-metal spoon to gently move the grains around in the strainer - this helps the kefir flow through without forcing the grains through. The grains should remain in the strainer, clean and distinct.
Do not force the grains through the strainer. Damaged grains lose their structure and effectiveness. Be gentle.
Step 4: Rinse the grains (optional)
Some home fermenters rinse their grains with filtered water between batches; others do not. Rinsing removes accumulated proteins and keeps the grains clean. Not rinsing preserves the active culture more completely. Both approaches produce good results - experiment and use whichever your grains seem to prefer (healthy, growing grains indicate the approach is working).
Never rinse with chlorinated tap water - use filtered water or the fresh milk itself.
Step 5: Start the next batch
Place the grains immediately back in a clean jar with fresh milk. The grains ferment best when working continuously - extended rests at room temperature without fresh milk cause over-acidification that can stress the culture.
For storage between batches: Place the grains in a small amount of fresh milk in the refrigerator. They can rest here for up to 1 week. The cold significantly slows their activity but does not stop it - they will need 1-2 batches to return to full activity after refrigeration.
Step 6: Refrigerate and consume the kefir
The strained kefir can be consumed immediately or refrigerated. It keeps for 2-3 weeks refrigerated and continues to develop in flavour - the tang intensifies slightly over the first few days as residual bacteria in the kefir continue to work.
Second fermentation for more fizz: For a fizzier, more complex kefir, transfer the strained kefir to a sealed swing-top bottle and leave at room temperature for 4-8 hours before refrigerating. The residual yeast and bacteria continue fermenting the remaining sugars, producing additional CO2. Open carefully over a sink.
Managing Fermentation Time and Temperature
The two variables you control are time and temperature. Understanding their effects allows you to adjust the kefir to your specific taste:
| Condition | Effect |
|---|---|
| Warmer temperature (24-26°C) | Faster fermentation, more sour result, higher yeast activity (more fizz) |
| Cooler temperature (18-20°C) | Slower fermentation, milder result, more time before over-fermentation |
| Longer fermentation (30-36 hours) | More sour, thicker, grain ratio may need adjustment |
| Shorter fermentation (12-16 hours) | Milder, thinner, closer to cultured milk than kefir |
| More grains per unit of milk | Faster fermentation, more sour |
| Fewer grains per unit of milk | Slower fermentation, milder |
Finding your ideal kefir: Start with the standard 1 tbsp grains per 500ml at room temperature for 24 hours. After your first 3-4 batches, adjust based on taste - if it's too sour, reduce the fermentation time or move to a slightly cooler spot; if too mild, extend the time or add slightly more grains.
Non-Dairy Milk Kefir
Milk kefir grains evolved to ferment lactose - the sugar in dairy milk - and they perform best in dairy. That said, non-dairy alternatives work with varying success:
Coconut milk (full-fat canned): The most reliable non-dairy option. Full-fat canned coconut milk provides sufficient fat and nutrients for the grains. The result is rich, slightly sweet, with a coconut flavour that works well. The grains need to be "refreshed" in dairy milk every 3-4 batches to maintain their health - pure coconut milk fermentation gradually weakens the culture.
Oat milk: Produces a thinner kefir because oat milk lacks the fat content and protein structure of dairy. Ferments more quickly. The grains weaken faster than with dairy or coconut milk - refresh in dairy every 2-3 batches.
Soy milk: Works reasonably well - higher protein content than oat milk produces a better set. A reliable dairy-free option if coconut milk is not preferred. Same refreshing schedule as oat milk.
Almond milk: Produces the thinnest, most liquid result. Not recommended as a primary medium - the grains weaken quickly.
The refreshing principle: Even if you primarily ferment non-dairy milk, keeping the grains healthy long-term requires occasional batches in dairy milk. This is the current limitation of truly dairy-free kefir - the grains need dairy to thrive. A rotation of one dairy batch per every 3-5 non-dairy batches maintains grain health indefinitely.
Grain Care and Long-Term Maintenance
Signs of healthy grains:
- White or off-white, cauliflower-like clusters
- Slightly rubbery, slightly gelatinous texture
- Growing in volume with each batch (healthy grains increase by 10-20% per week)
- Active fermentation in 18-24 hours
Signs of stressed grains:
- Slimy or very soft texture
- Very slow fermentation (48+ hours to set)
- Grains dissolving or losing their cluster structure
- Kefir that is very thin and not thickening
Reviving stressed grains:
- Use fresh, high-quality full-fat dairy milk
- Increase fermentation temperature slightly (22-24°C)
- Change the milk more frequently (every 18 rather than 24 hours) to prevent over-acidification
- After 3-5 revival batches, the grains should return to healthy activity
Excess grains: Like water kefir grains, milk kefir grains grow continuously. Remove excess once the total volume exceeds approximately 3-4 tbsp (for a 500ml batch). Excess grains can be: shared with other home fermenters, blended into smoothies (edible, with a mild tangy flavour), or composted.
Long-term storage:
- Refrigeration (up to 2 weeks): Store in a small amount of fresh milk in a sealed jar
- Freezing (up to 3 months): Coat in a little milk, freeze in an airtight container. Thaw in fresh milk in the refrigerator overnight, then ferment as normal - may need 2–3 batches to return to full activity
- Drying (up to 6 months): Rinse grains, spread on parchment, dry at room temperature for 24–48 hours. Store in an airtight jar. Rehydrate in fresh milk over 3-5 days
What to Do with Kefir
Drink it straight
The most straightforward use - poured from the jar, slightly cold from the refrigerator, as a morning drink or with meals. The flavour is more complex than yogurt and more interesting than buttermilk. Its slight effervescence (from residual CO2) makes it surprisingly refreshing.
Kefir smoothies
Kefir as the liquid base for smoothies provides thickness, tang, protein, and probiotics without the heaviness of yogurt. Particularly good with frozen mango, banana, and ginger; or with frozen berries and a teaspoon of honey.
Kefir overnight oats
Replace the milk in overnight oats with kefir. The lactic acid of the kefir slightly softens the oats during overnight resting, producing a creamier result, while the tang balances the sweetness of fruit toppings. See Matcha Overnight Oats for the base recipe - kefir substitutes directly for the milk.
Kefir in baking
Kefir as a replacement for buttermilk in pancakes, quick breads, muffins, and cakes. The acid reacts with baking soda, providing lift and tenderness. The slight fizz of kefir produces a lighter crumb than regular milk. Use in a 1:1 replacement for buttermilk in any recipe.
Kefir dressings and dips
Thin kefir is an excellent base for salad dressings - its tang replaces vinegar or lemon juice while adding creaminess. Combine with olive oil, garlic, fresh herbs, and a pinch of salt for a dressing that is simultaneously rich and sharp. Thicker kefir (strained for a few hours) works as a dipping sauce with similar applications to labneh.
Strained kefir
Strain kefir through muslin for 4-6 hours and it becomes a soft, spreadable product similar to labneh - but with the more complex, slightly yeasty flavour of kefir rather than pure yogurt tang. Use in all the same applications as Labneh.
Kefir vs. Yogurt: The Honest Comparison
| Feature | Milk Kefir | Yogurt |
|---|---|---|
| Microbial species | 30-50 | 2-3 |
| Fermentation temperature | Room temperature (no heat needed) | 40-45°C (precise temperature required) |
| Equipment needed | Jar, strainer | Jar, thermometer, incubation method |
| Active time per batch | 5 minutes | 15 minutes |
| Fermentation time | 24 hours | 8-12 hours |
| Texture | Pourable drink | Thick, spoonable |
| Flavour | More tangy, slightly yeasty, complex | Milder, clean tang |
| Probiotic diversity | Very high | Moderate |
| Kefiran content | Yes (unique to kefir) | No |
Neither is superior - they serve different purposes and have different places in the kitchen. Yogurt is spoonable and versatile in cooking; kefir is a drink and a baking ingredient. Both are genuinely good for gut health. The home that maintains both has the full spectrum of fermented dairy covered.
Pro Tips
- Never use metal equipment with kefir grains. Metal ions can damage the microbial community. Use plastic or glass for everything that contacts the grains - strainers, spoons, storage jars.
- Consistent milk quality matters. The grains adapt to the specific milk you use. Switching between significantly different milks (raw to pasteurised, full-fat to semi-skimmed) produces temporary disruption in fermentation activity. Consistency produces consistency.
- The grains should always look distinct and cauliflower-like. If they start to look slimy, dissolved, or stringy, the culture is stressed. Address the cause (chlorinated water, metal contact, extreme temperature) and give the grains several revival batches in fresh full-fat dairy milk.
- Taste every batch. Kefir flavour varies with season, milk temperature, and grain activity. Tasting each batch helps you understand your specific culture's behaviour and adjust timing as needed.
- The second fermentation changes the drink. If your primary ferment kefir seems too mild or not fizzy enough, try a 6-8 hour sealed second ferment at room temperature before refrigerating. The difference in carbonation and flavour is significant.
Common Mistake: Using UHT Milk Consistently UHT (ultra-high-temperature) milk works for kefir but the high-heat treatment destroys the native milk microbiome and some of the proteins that support grain health. Used occasionally, UHT is fine. Used as the primary milk, it gradually weakens the grains over many batches. Fresh pasteurised whole milk is the ideal; raw milk from a trusted source produces the most complex kefir. If UHT is your only option, add one batch of fresh pasteurised milk per every 3-4 UHT batches.
FAQ
Q: My kefir separated into curds and whey. Is it ruined?
No - separation into curds (thick white layer) and whey (clear yellowish liquid) simply means the kefir fermented longer than ideal and the milk proteins have coagulated. Stir vigorously or blend briefly to re-combine, then refrigerate. The flavour will be very sour but the kefir is perfectly safe. Next batch: reduce fermentation time by 2-4 hours.
Q: How do I know if my grains are growing?
Weigh them before and after a few batches, or simply note whether the volume of the cluster is visibly larger after each batch. Healthy grains increase by approximately 10-20% per week when fermenting daily. If the grains are not growing, they may be stressed or the fermentation conditions may need adjustment.
Q: Can I ferment longer than 24 hours for a stronger kefir?
Yes - up to 48 hours produces a very sour, very thick kefir that has separated significantly. Some people enjoy this very tart version; others find it too intense to drink straight but useful in cooking (in marinades, in baking, as a very tangy dressing base). Beyond 48 hours, the grains may begin to be stressed by the accumulated acidity - change the milk.
Q: What does kefir taste like if I've never had it?
Imagine yogurt as a drink - but tangier, slightly fizzy, with a faint yeasty note that yogurt doesn't have. The sourness is clean and forward, the finish is complex, and the texture is thinner than drinking yogurt. Most people find it immediately pleasant; some find it too sour at first and prefer to begin with shorter fermentation times and gradually increase.
Q: Is kefir safe during pregnancy?
Most fermented dairy products are considered safe during pregnancy when made from pasteurised milk. The live cultures in kefir are not a concern; the pasteurisation of the milk ensures safety from pathogenic bacteria. Consult your healthcare provider if you have specific concerns - this is general information, not medical advice.
🔗 Continue Fermenting
- Yogurt from Scratch: Better Than Any Shop-Bought Version
- Labneh: The Strained Yogurt That Becomes Cheese
- Water Kefir: The Fizzy Probiotic Drink You Can Make in 48 Hours
- The Gut Health Connection: What Fermented Foods Actually Do
- How to Build a Fermentation Weekly Routine
- Fermentation & Gut Health at Home: The Ultimate Guide
Latest