How to Caramelise Onions Properly (It Takes 40 Minutes)
The most misrepresented time in recipe writing - what is actually happening, why the shortcut doesn't work, and how to do it right
There is a specific lie that appears in recipe writing more consistently than any other. It has appeared in cookbooks published by respected authors, in recipes on the websites of major food publications, and in cooking shows watched by millions. It is this: "caramelise the onions, 5-10 minutes."
Caramelising onions takes 35-45 minutes minimum. The "5-10 minute" instruction produces softened, slightly browned onions - which are pleasant and useful, but which are not caramelised onions. Properly caramelised onions are a completely different ingredient: deeply golden-brown to mahogany, collapsed and jammy, intensely sweet with a complex, slightly bitter depth, reduced to approximately one-quarter of their original volume. The transformation from raw onion to this is not achievable in 10 minutes. It requires 35-45 minutes of patient cooking at medium to medium-low heat.
This guide explains why - the specific chemistry that requires this time - and the legitimate techniques that speed the process slightly without sacrificing the result. It also covers every application where properly caramelised onions transform a dish.
The Chemistry: Why Time Is the Ingredient
When an onion is sliced and added to a pan with fat over heat, a sequence of chemical processes begins - each one requiring the previous to complete before it can start.
Stage 1 - Water evaporation (first 10-15 minutes): A raw onion is approximately 89% water. As it heats, this water evaporates. During this stage, the onion softens and becomes translucent. The volume decreases significantly. The temperature of the onion cannot exceed 100°C while significant water remains - the evaporating water keeps the temperature at the boiling point of water.
This is why the first 10-15 minutes of caramelising onions looks like very little is happening. Most of the energy is going into evaporating water, not into browning. A recipe that claims 10 minutes total has the onions finishing at this stage - translucent and soft, but not caramelised.
Stage 2 - Maillard browning begins (15-25 minutes): As the water content drops and the surface temperature rises above 140°C, the Maillard reaction begins - amino acids and reducing sugars in the onion producing brown colour and complex flavour compounds. The onions start to colour at the edges and where they contact the pan surface.
This is the stage where most home cooks stop, believing the onions are done because they have "some colour." They are not done. The Maillard browning is just beginning.
Stage 3 - Fructose caramelisation (25-40 minutes): Onions are unusually high in fructose (a reducing sugar). As the water continues to evaporate and temperatures rise further, this fructose undergoes caramelisation - the sugar molecule breaks down and reforms into hundreds of new compounds with sweet, complex, slightly bitter flavour characteristics. This is specifically what gives properly caramelised onions their distinctive sweetness and depth.
Fructose caramelises at approximately 110°C - a lower temperature than sucrose (160°C) - which is why caramelised onions require less heat than caramelised sugar. But the process still requires time for the temperature gradient through the large mass of onion to rise sufficiently and for the reactions to run to completion.
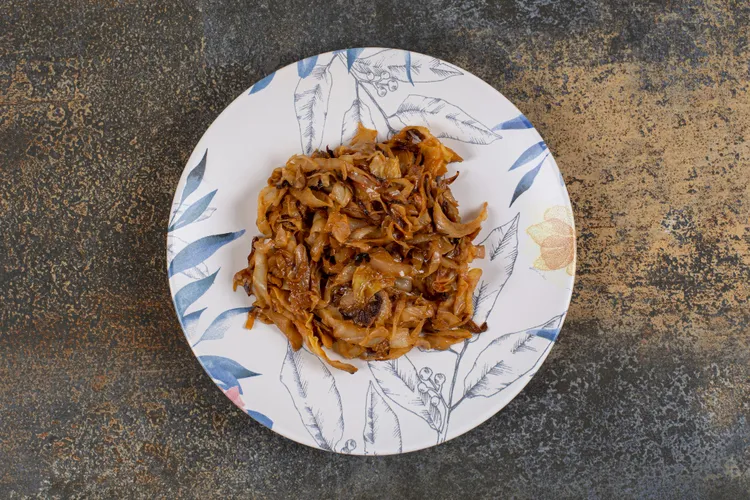
The result at 40 minutes: Deep golden-brown to mahogany colour throughout. Volume reduced to approximately 25% of the original. Texture collapsed and jammy - the cell structure has broken down completely. Flavour: intensely sweet, deeply complex, slightly bitter at the edges.
Ingredients
Makes approximately 200g caramelised onions (from 1kg of raw onions)
- 1kg white or yellow onions (approximately 4 large), peeled and sliced 3-5mm thick with the grain (from root to tip - long slices that caramelise more evenly than across-the-grain half-moon slices)
- 2 tbsp neutral oil or unsalted butter (or a combination - oil for higher heat tolerance, butter for flavour)
- ½ tsp fine sea salt - added at the start to draw out moisture and accelerate the initial water-evaporation stage
- Optional: 1 tsp sugar - adds substrate for caramelisation if using a variety of onion that is lower in natural sugars (red onions benefit most)
- Optional: 1 tbsp balsamic vinegar or 50ml white wine - added in the final 5 minutes to deglaze and add acidity
The Method
Step 1 - Set up correctly: Use a wide, heavy pan - a large stainless steel or enamelled cast iron pan that allows the onions to spread in a thin-ish layer. A deep, narrow pan with onions piled high takes significantly longer because the steam produced by the bottom layer keeps the temperature of the upper layers at 100°C.
Step 2 - Start at medium heat: Heat the oil or butter over medium heat. Add all the onions at once - the pan will seem dramatically overcrowded. Add the salt. Stir to coat everything in fat.
Step 3 - Cook, stirring occasionally: The onions need to be stirred every 3-5 minutes - frequently enough to prevent any section from burning (where it contacts the pan directly for too long), but infrequently enough to allow the Maillard and caramelisation reactions to proceed at the pan surface.
Don't rush with high heat: Increasing the heat shortens the time but introduces the risk of burning before caramelisation completes. Some spots will char while others are still pale. The characteristic deep, even, jammy colour of properly caramelised onions requires medium to medium-low heat and patience.
Step 4 - The sequence of visual changes:
- 5 minutes: Softening, becoming translucent. Volume reduced by 30%. Still mostly water-evaporation stage.
- 10-15 minutes: Noticeably softer and beginning to colour at the edges and where they contact the pan. You can smell the sweetness beginning.
- 20-25 minutes: Golden colour throughout. Volume halved. Sweet smell intensifying.
- 30-35 minutes: Deep gold to light amber. Collapsed and jammy. Volume now 30-35% of original.
- 40 minutes: Deep amber to mahogany. Intensely sweet and complex aroma. Volume approximately 25% of original. This is properly caramelised.
Step 5 - Deglaze (optional but recommended): Add 1 tbsp of balsamic vinegar, 50ml of white wine, or 50ml of stock to the pan. Scrape the fond from the base of the pan - the sticky, dark residue that has built up is concentrated flavour. The liquid deglazes this fond and integrates it into the onions. The acidity of the vinegar or wine balances the sweetness.
Allow the liquid to reduce fully before removing from heat.
The Legitimate Speed Techniques
These techniques reduce the time to 25-30 minutes without sacrificing the result significantly:
Add a splash of water or stock when the onions start to stick: Adding a tablespoon of liquid when the onions stick and scraping the fond prevents burning while keeping the Maillard products in the onions. This allows slightly higher heat without burning risk. Add liquid in small amounts - just enough to deglaze, not enough to re-steam the onions.
Cover the pan for the first 10 minutes: Trapping steam during the initial water-evaporation phase speeds softening. Remove the lid after 10 minutes and continue uncovered - the steam must escape for browning to occur.
Use a wider pan: More surface area = more evaporation = faster water loss = earlier progression to the browning stage. A 30cm pan caramelises faster than a 20cm pan with the same quantity of onions.
Start with thinly sliced onions: Thinner slices (3mm vs. 5mm) have less mass to heat through and lose water faster. Cut with the grain (root to tip) for long, thin strips rather than across the grain for half-moons - the longer surface area caramelises more evenly.
The baking soda hack (use cautiously): Adding a pinch (⅛ tsp) of baking soda raises the pH of the onions, which accelerates the Maillard reaction. The time can be reduced to 15-20 minutes. The drawback: the texture becomes mushy rather than jammy, and the flavour has a slight soapy quality at higher quantities. Use sparingly if at all.
Twelve Applications
1. French Onion Soup
The archetypal application - a bowl of properly caramelised onions in deeply flavoured beef stock, topped with a crouton and melted Gruyère. The quality of the onion caramelisation is the quality of the soup. With 10-minute onions: a pleasant broth. With 40-minute onions: one of the great soups.
2. Caramelised Onion Tart
Line a blind-baked shortcrust pastry case with 300g of caramelised onions. Pour over a custard of 3 eggs + 200ml cream + 50g Gruyère. Bake at 170°C for 30 minutes. The onions become the filling rather than an ingredient - this requires the full caramelisation or the tart tastes of cooked onion rather than the sweet depth of proper caramelisation.
3. Burger Topping
The caramelised onion in a proper smash burger or a quality beef burger is one of the most important components. A thin layer of deeply caramelised onions adds more flavour contrast against the beef than most other toppings. See the Plant-Based Burger in the Plant-Based collection for the application in a non-beef context.
4. Focaccia Topping
Caramelised onions spread over dimpled focaccia before baking - alongside thyme and flaky salt - produce one of the great bread toppings. See the Focaccia recipe in the Baking collection.
5. Liver and Onions
The British classic - calves' liver seared briefly (2 minutes per side maximum) served with deeply caramelised onions and a simple gravy. The sweet depth of the onions is the essential contrast to the liver's mineral richness. Without proper caramelisation, the dish lacks its defining counterpoint.
6. Shakshuka Base
Deeply caramelised onions as the base of a shakshuka - before the tomatoes and spices - produces a noticeably more complex sauce than the version that starts with raw onion. See One-Pan Shakshuka.
7. Pizza Base / Flatbread
Spread thin across a pizza base before cheese and toppings, caramelised onions provide a sweet, complex layer that raw or lightly cooked onion cannot replicate. Particularly good on a white pizza (no tomato sauce) with goat's cheese and thyme.
8. Caramelised Onion Dip
Stir a large batch of caramelised onions into whipped cream cheese or soured cream with a little garlic and fresh thyme. The onion dip made from properly caramelised onions and from packet soup mix are genuinely different products. Serve with crisps, crudités, or the Scandinavian crispbread from the Baking collection.
9. Pasta Sauce Base
Caramelised onions form the sweetness base of many southern Italian pasta sauces - particularly those without tomato. Combined with white wine, stock, pasta water, and good olive oil, they produce a sauce that is sweet, complex, and entirely different from onion-flavoured pasta.
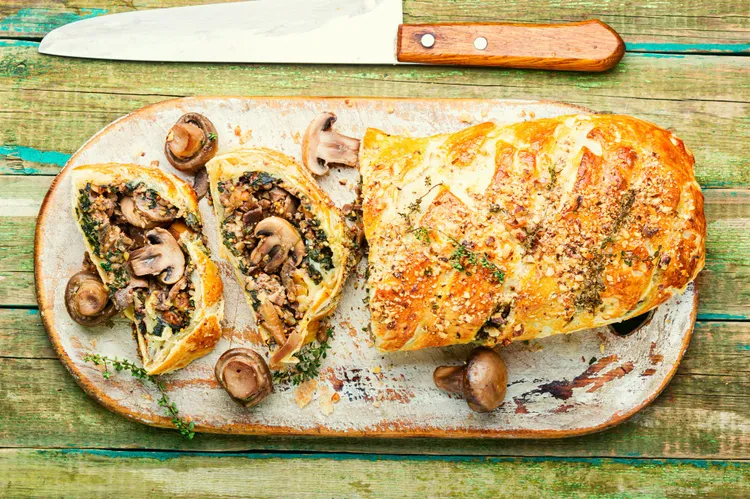
10. Stuffed Pastry Filling
Mixed with mushrooms, herbs, and cheese, caramelised onions form the most flavourful base for a rough puff pastry turnover or sausage roll filling. See Rough Puff Pastry in the Baking collection.
11. Grain Bowl Component
A tablespoon of caramelised onions on a grain bowl - with roasted vegetables, a grain, a protein, and a dressing - is one of the most impactful additions. Their concentrated sweetness and complexity work against both acid (lemon dressing) and richness (avocado, tahini).
12. Grilled Cheese Enhancement
Caramelised onions inside a grilled cheese sandwich are the single upgrade that most dramatically improves the sandwich. The sweet complexity against the salty, melted cheese is one of the great flavour combinations in simple cooking.
Storing Caramelised Onions
The batch-cooking strategy: The time investment in caramelising onions is fixed regardless of quantity - 1kg takes the same 40 minutes as 3kg, with proportionally more onions going in (using a larger pan or two pans simultaneously). Making a large batch and storing it is significantly more efficient than making small quantities repeatedly.
Refrigerator: Store in a sealed container for up to 1 week. The onions continue to deepen in flavour over the first 2-3 days.
Freezer: Freeze in tablespoon-sized portions (ice cube tray method - fill each cube, freeze solid, transfer to a sealed bag). Keeps for 3 months. Thaw directly into a hot pan or at room temperature. Having frozen caramelised onion portions means adding this ingredient to any preparation takes 30 seconds rather than 40 minutes.
Pro Tips
- Make a big batch. 1kg of onions produces approximately 200g of caramelised onions - less than you expect. For any serious application (French onion soup, tart filling), you want at least 300g finished. Start with 1.5-2kg of onions if making a batch to store.
- Don't add salt at the end. Salt added at the beginning draws water out of the onion through osmosis, accelerating the initial water-evaporation stage and helping the onions cook down faster. This is one of the legitimate time-savers.
- The fond on the pan base is flavour. The dark, sticky residue that builds up on the base of the pan during caramelisation is concentrated Maillard product. Scrape it back into the onions regularly with a wooden spoon; deglaze with a splash of water or wine if it's threatening to burn. This fond is what makes caramelised onions deeply flavoured rather than just sweet.
- Trust the colour, not the clock. Every pan, hob, and onion variety behaves slightly differently. The visual guide - the progression from translucent to golden to amber to mahogany - is more reliable than timing.
The Recipe Lie: "Caramelise the Onions, 5-10 Minutes" If a recipe says 5-10 minutes for caramelised onions, it means softened and lightly browned onions. These are good and useful. They are not caramelised. The distinction matters because the recipe was written with the full 40-minute result in mind - the sweetness, the depth, the jammy texture. Making the dish with 10-minute onions produces a version that is missing its foundational flavour. If a recipe depends on caramelised onions - French onion soup, caramelised onion tart, a burger with caramelised onion - give the onions the time they need. Build it into the plan. Make a batch and freeze the rest.
FAQ
Q: What type of onion caramelises best?
White and yellow (brown) onions are the standard for caramelising - high sugar content, relatively neutral flavour that develops well with heat. Red onions caramelise beautifully but have a slightly more complex flavour (more pungent raw, more tart when caramelised). Sweet onions (Vidalia, Walla Walla) caramelise fastest due to their higher sugar content. Shallots caramelise more quickly than onions because of their smaller size and higher sugar content - excellent for individual portions.
Q: Can I caramelise onions in the oven?
Yes - and it produces excellent results with less stirring. Toss sliced onions with oil and salt in a large roasting tin. Roast at 180°C (fan) for 60-75 minutes, stirring every 20 minutes, until deeply caramelised. The oven method is particularly good for large batches where stovetop management is impractical.
Q: My onions burned rather than caramelised. What went wrong?
The heat was too high and/or the pan was too dry. Caramelisation requires sustained heat - but the fructose that caramelises in onions reaches its burning point (above approximately 180°C) quickly if there is insufficient moisture in the pan. Use medium to medium-low heat; add a splash of water or stock when the onions stick and scrape the fond before it burns.
🔗 Apply the Technique
- How to Make a Pan Sauce: Four Steps to Restaurant Flavour
- Shortcrust Pastry: The Foundation of Every Tart
- Focaccia: The Forgiving Bread That Always Works
- How to Sear Meat: The Maillard Reaction Explained
- The Art of Seasoning: Salt, Acid, Fat, and Heat
- Knife Skills & Kitchen Techniques: The Complete Guide
Latest