Miso from Scratch: The Japanese Ferment Worth the Wait
3 to 12 months. 2 hours of active work. One of the most extraordinary things a home fermenter can make.
Most of the ferments in this collection are measured in days. Sauerkraut: 5-14 days. Kimchi: 3-21 days. Water kefir: 48 hours. Labneh: 24 hours. These are ferments that reward patience within a reasonable human timescale.
Miso is different. Miso is months.
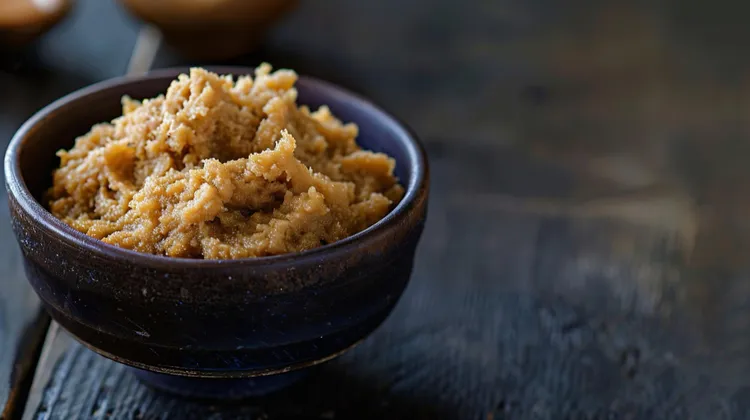
The shortest viable miso - shiro miso, white miso - ferments for 3-4 weeks. A medium miso takes 3-6 months. Traditional long-aged aka miso (red miso) ferments for 12-24 months, sometimes longer. During that time, the temperature cycles through the seasons, the koji enzymes work through the soybean proteins, and the lactic acid bacteria slowly acidify the paste. The result - tasted at the end of that process - is one of the most complex flavours a fermented food can produce: simultaneously sweet, salty, savoury, and deeply umami, with a rounded depth that has no parallel in any quickly made preparation.
The active work is roughly 2 hours. The patience is the technique.
This guide makes the case for trying it - and then gives you everything you need to succeed.
📖 Koji is the key ingredient. Koji (Aspergillus oryzae grown on rice or barley) provides the enzymes that transform soybeans into miso. Without koji, the fermentation cannot produce the amino acids and sugars that make miso what it is. See The Science of Fermentation for the full koji enzyme explanation and the Asian Street Food Pantry for sourcing.
What Miso Is: The Multi-Organism Collaboration
Miso is the product of three overlapping fermentation processes:
The koji stage (enzymatic): Aspergillus oryzae - the koji mould grown on rice or barley - produces amylases, proteases, and lipases. The amylases break starch into sugars (producing sweetness). The proteases break protein into amino acids, releasing glutamates (producing umami). The lipases break fats into fatty acids (contributing to miso's characteristic richness and depth). This enzymatic activity is what transforms soybeans - high in protein and starch but not naturally complex in flavour - into a paste of extraordinary depth.
The LAB stage (lactic acid): Lactic acid bacteria produce lactic and acetic acids that progressively acidify the paste. This acidification is what preserves the miso, creates its characteristic tang, and inhibits spoilage over the long fermentation period. The LAB come from the environment, the soybeans, and the koji.
The yeast stage (alcoholic): Wild yeasts - including the same yeasts present in sourdough starters - produce small amounts of alcohol and CO2 during fermentation. The alcohol interacts with the amino acids and sugars to produce hundreds of flavour compounds via esterification. This is a significant contributor to the complex, wine-like character of long-aged miso.
All three stages overlap and interact - the acidification from the LAB creates conditions that favour certain yeasts; the sugars released by the koji enzymes fuel both the LAB and the yeasts. Miso is a succession ecology of fermentation, not a single process.
The Types of Miso and Their Fermentation Times
| Type | Koji Base | Fermentation | Flavour | Salt Level |
|---|---|---|---|---|
| Shiro (white) | Rice koji | 3-8 weeks | Sweet, mild, delicate | Low (5-7%) |
| Shinshu (yellow) | Rice koji | 3-6 months | Balanced, slightly earthy | Medium (11-13%) |
| Aka (red) | Rice or barley koji | 6-24 months | Deep, salty, complex, pungent | High (11-14%) |
| Mugi (barley) | Barley koji | 3-12 months | Earthy, rustic, slightly sweet | Medium (10-12%) |
| Hatcho | Soybean koji | 24-36 months | The most intense; very salty, very complex | Very high (14-20%) |
For a first-time home fermenter: Start with shinshu (yellow) miso at a 3-6 month fermentation. It produces a balanced, genuinely impressive result without the very long commitment of red miso or the very short window of white miso (which is easier to over-ferment accidentally).
Ingredients
Makes approximately 700g finished miso | Active time: 2 hours | Fermentation: 3-6 months
For the Miso
- 200g dried soybeans - or other legumes: chickpeas produce a lighter miso; black soybeans produce a sweeter, slightly earthier one. Soybeans are traditional and produce the most authentic result.
- 200g rice koji (or barley koji for mugi miso) - the enzyme-producing culture. Available from Japanese grocery stores, online suppliers (South River Miso, GEM Cultures, and others), and increasingly from specialty fermentation retailers.
- 80g non-iodised salt - approximately 12% of the total finished weight (soybeans double in weight when cooked; calculate based on cooked weight + koji weight)
- A small amount of previously made miso (tane miso or seed miso) - optional but recommended; a tablespoon of good-quality commercial miso introduces LAB that can accelerate the fermentation. Omit if unavailable.
For Container Preparation
- 1 tbsp additional salt for the surface layer
- Sake or mirin for wiping the container walls (optional but traditional - the alcohol inhibits surface mould)
Equipment
- Large pot for soaking and cooking soybeans
- Food mill, potato ricer, or food processor - for pureeing the cooked soybeans
- Large mixing bowl
- A fermentation vessel - a ceramic crock, a large glass jar (2-3 litres for this batch), or a purpose-made miso crock. The vessel must be non-reactive (no bare metal). Ceramic is traditional and ideal.
- A weight - a heavy stone, a bag of salt, or a purpose-made fermentation weight - to press the miso flat and encourage even fermentation
- Cling film or large sheets of food-safe plastic - for pressing directly onto the miso surface to exclude air
Method
Step 1: Soak and cook the soybeans (overnight + 3-4 hours)
Soaking (overnight): Place the dried soybeans in a large bowl and cover with 3-4 times their volume of cold water. Leave to soak for 12-16 hours. The beans will roughly double in size.
Cooking: Drain, rinse, and place in a large pot. Cover with fresh cold water by at least 5cm. Bring to a boil and skim off any foam. Reduce to a steady simmer and cook for 3-4 hours until the soybeans are very soft - a bean pressed between thumb and forefinger should crush with minimal resistance, like a ripe avocado. They will be cooking inside the miso for months; slightly under-cooked beans will not fully convert.
Pressure cooker shortcut: Cook at high pressure for 30-35 minutes. Significantly faster with identical results.
Reserve the cooking liquid - it is rich in protein, starch, and flavour. You will use it to adjust the texture of the miso paste.
Allow the soybeans to cool until warm to the touch (below 40°C) before proceeding - hot beans will damage the koji enzymes.
Step 2: Prepare the salt-koji mixture
In a large bowl, combine the rice koji with 60g of the salt (reserving 20g for the surface layer). Mix thoroughly with your hands, breaking up any clumps in the koji. The salt-koji mixture should be uniform and slightly damp from the koji moisture.
If using tane miso: Add 1 tbsp of good-quality commercial miso to the salt-koji mixture and mix well. This inoculates the batch with active LAB.
Step 3: Purée the soybeans
Transfer the warm (not hot) soybeans to a food mill, potato ricer, or food processor. Purée until very smooth - the texture should resemble a firm, slightly grainy paste with no whole beans remaining. Add a small amount of the reserved cooking liquid if needed to achieve a paste that holds its shape but is not dry.
Miso made from incompletely puréed soybeans has an uneven texture and ferments less uniformly.
Step 4: Combine
Add the salt-koji mixture to the warm soybean purée. Mix very thoroughly - knead with your hands for several minutes until the mixture is completely uniform. It should look like a firm, slightly sticky, uniformly coloured paste. No streaks of koji; no pockets of purée.
Taste a small amount. It should be quite salty - the salt is both a flavouring and a preservative, and the saltiness will mellow significantly over months of fermentation.
Adjust texture: The paste should be firm enough to roll into balls without sticking excessively to your hands. If too dry, add reserved cooking liquid a tablespoon at a time. If too wet, add a small amount of additional koji.
Step 5: Pack the vessel
Prepare the vessel: Wipe the interior of the fermentation crock with sake or mirin (if using). This traditional step inhibits surface mould during the long fermentation.
Form and pack the miso: Shape portions of the miso into rough balls (this helps eliminate air pockets during packing). Press each ball firmly into the vessel, working from the bottom upward. Press down firmly after each layer to eliminate all air pockets - air is the enemy of miso fermentation, creating pockets where mould can establish.
Once all the miso is packed, press the surface flat and smooth.
Salt the surface: Scatter the remaining 20g of salt evenly over the surface of the miso. This surface salt layer creates an inhospitable environment for mould at the most exposed point of the ferment.
Cover the surface: Press a sheet of cling film directly onto the surface of the miso, eliminating all air between the film and the miso. Some fermenters wipe the inner walls above the miso with sake before the final seal.
Apply the weight: Place a weight on top of the cling-film-covered miso. The weight encourages the miso to compact and prevents air pockets from forming as the miso settles during fermentation.
Cover the vessel: Cover the entire vessel with a cloth or lid to protect from debris and insects while allowing some air exchange. Label with the start date, expected completion date, and the recipe details.
Step 6: Ferment
Location: A cool, dark place with relatively stable temperature - a cupboard, a cellar, a basement. Avoid places with extreme temperature fluctuation or direct sunlight.
Ideal temperature range: 15-25°C. The fermentation is most active in summer (temperatures above 20°C) and slower in winter (below 15°C). This seasonal rhythm is actually beneficial - the summer warmth accelerates enzymatic activity; the winter cool allows more nuanced flavour development.
Monthly inspection: Check the miso once per month:
- Look for surface mould: A white, flat layer is typically harmless oxidation - scrape off 1-2cm of the surface miso (discard this small amount) and recover with fresh cling film. Pink, green, or black mould indicates a more significant issue - scrape off generously and re-cover. The miso below the surface layer is almost always fine.
- Look at the colour: The miso will deepen in colour over time - from cream or pale gold (early) to golden brown (mid-fermentation) to deep brown (long fermentation). This colour development is a result of Maillard reactions and is correct.
- Smell: Healthy miso smells complex, savoury, and slightly alcoholic. Off smells (strongly acetone-like, rotten) indicate a problem with the fermentation conditions.
Step 7: Taste and finish
After the minimum fermentation time (3 months for yellow miso), taste the miso:
- Still quite sweet and mild: Allow more time - it hasn't fully developed yet
- Balanced - salty, sweet, savoury, complex: Ready for use
- Very salty and intensely savoury: Full fermentation achieved - use as is or blend with younger miso to balance
The miso is ready when it tastes like miso - the balance of salt, sweetness, umami, and subtle acidity that is one of the defining flavours of Japanese cooking.
Finishing: Remove the weight and cling film. Scrape off the salt surface layer and any surface oxidation. Transfer the finished miso to clean jars. Refrigerate.
Storage: Refrigerated miso keeps indefinitely - it continues to develop slowly in the fridge, becoming more complex over months. Commercial miso typically has a best-before date of 12 months, but properly fermented homemade miso improves with age.
Using Your Miso
The miso you have made is a complex, living condiment that improves almost everything it touches. The fundamental rule: never boil miso - the high heat kills the live cultures and dulls the flavour significantly. Add miso off the heat, or stir into soups that have been removed from the flame.
The essential applications:
- Miso soup: The simplest and most direct use - dashi, miso, and chosen additions. See Matcha Miso Soup for the full guide.
- Miso butter: Combine 2 tbsp miso with 100g softened butter. Use on grilled corn, steak, fish, or roasted vegetables. Extraordinary.
- Miso glaze: 2 tbsp miso + 1 tbsp mirin + 1 tbsp sake + 1 tsp sugar. Brush onto fish (particularly salmon), aubergine, or chicken before grilling or roasting.
- Miso dressing: 1 tbsp miso + 2 tbsp rice vinegar + 1 tbsp sesame oil + 1 tsp honey. A deeply savoury salad dressing that works on any greens.
- Miso in braises: A tablespoon stirred into a braise or stew adds umami depth that is not identifiable as Japanese - it simply makes the dish taste more complex and more complete.
- Miso caramel: Miso stirred into caramel sauce produces the most compelling sweet-savoury combination in baking. Use as a topping for ice cream, cakes, or in Matcha Apple Cake variations.
Pro Tips
- The salt percentage is a spectrum, not a fixed point. Lower salt (9-11%): faster fermentation, milder flavour, shorter shelf life. Higher salt (13-15%): slower fermentation, more complex flavour, longer shelf life. Your first batch should use the standard 12% for predictability.
- Eliminate air pockets at every stage. Air pockets are where mould and spoilage establish. Pack firmly, press consistently, cover the surface completely.
- The monthly inspection is non-negotiable. Surface mould caught early (a few centimetres of oxidation) is easily managed. Surface mould discovered after 3 months of neglect may require discarding significantly more of the miso.
- Temperature extremes work against you. Very cold cellars (below 10°C) slow fermentation to the point where even a 6-month batch is barely started. Very hot locations (above 30°C) produce rapid, uncontrolled fermentation that can develop off-flavours. Aim for the 15-25°C range.
- Make notes. The 3-6 month fermentation is long enough that you will forget what you did unless you write it down. Start date, koji type, soybean weight, salt percentage, current status at each inspection. These notes are invaluable for improving the next batch.
Common Mistake: Under-cooking the Soybeans The most common cause of grainy, incompletely converted miso is soybeans that were not cooked long enough before puréeing. The beans must be very soft - crushing easily between two fingers - before proceeding. Firm, al dente beans don't purée smoothly and the koji enzymes cannot fully penetrate incompletely broken-down protein structures. This produces a miso that ferments partially but never achieves the full amino acid conversion that creates genuine umami depth. Cook until very soft. Then cook for another 20 minutes.
FAQ
Q: Where do I source rice koji?
Japanese grocery stores sometimes carry fresh or dried koji. Online suppliers (South River Miso, GEM Cultures, and similar in the US; Japan Centre and Sous Chef in the UK) carry both ready-made koji and koji spores for growing your own. Dried koji is the most widely available and works very well. Freeze-dried koji is also available online.
Q: Can I make miso from something other than soybeans?
Yes - chickpea miso is a popular variation with a lighter, slightly sweeter character. Black soybean miso has a distinctive deep flavour. Lentil miso is faster-fermenting due to the softer texture. Any legume with high protein content can theoretically be used with rice koji and salt to produce a miso-like condiment. The flavour will be different from traditional soybean miso but often excellent in its own right.
Q: What if my miso develops significant mould at 2 months?
Scrape off generously - remove 2-3cm of miso from the affected area plus any clearly discoloured miso nearby. Re-cover with cling film, re-apply the weight, and re-salt the surface. This is a normal occurrence in home miso-making, particularly in warm, humid kitchens. The miso below the surface layer is almost always unaffected. If the mould penetrates very deeply or the miso smells strongly rotten (not just funky and complex), discard and start again.
Q: Can I taste the miso before it's finished?
Absolutely - and you should, monthly from the 3-month mark. Tasting teaches you what your specific miso is doing at each stage and helps you decide when it has reached your preferred flavour. Some home fermenters eat their miso at every stage, using the early-stage (young, very sweet) miso for different applications than the long-fermented version.
🔗 Use Your Miso
- Matcha Miso Soup - the most direct application
- The Essential Asian Street Food Pantry
- The Science of Fermentation: What's Actually Happening in Your Jar
- Matcha & Gut Health: What the Research Actually Says
- How to Build a Fermentation Weekly Routine
- Fermentation & Gut Health at Home: The Ultimate Guide
Latest