How to Cook Perfect Hard Boiled Eggs Every Time
Hard boiled eggs seem simple - until they turn rubbery, green, or impossible to peel. With the right timing, temperature, and cooling method, you can make perfectly cooked eggs with creamy yolks and clean shells every time. Once you know the science, this everyday staple becomes completely foolproof.
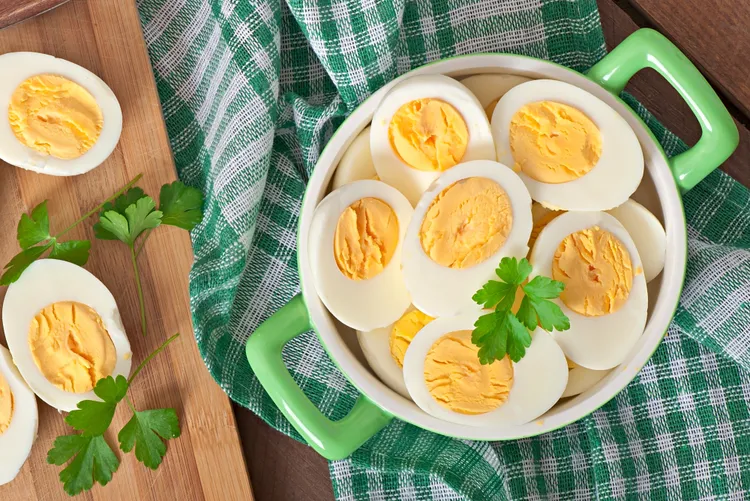
Few foods are as simple yet as frustrating as hard boiled eggs. When done right, they’re creamy, tender, and easy to peel, making them perfect for breakfast, salads, snacks, and meal prep. When done wrong, they’re rubbery, green-ringed, and stubbornly glued to their shells. The secret to perfect hard boiled eggs isn’t luck - it’s understanding how eggs respond to heat, timing, and cooling. Once you master a reliable method, consistent results become effortless.
It all starts with the eggs themselves. Slightly older eggs are actually better for hard boiling than very fresh ones because the whites separate more easily from the shell. As eggs age, their internal pH rises, weakening the bond between the egg white and the membrane. This small change makes a huge difference when it’s time to peel. If you only have fresh eggs, don’t worry - proper technique can still deliver excellent results.
The cooking process begins by placing eggs in a single layer in a saucepan. Crowding causes uneven cooking and increases the risk of cracking. Add cold water until the eggs are covered by about an inch. Starting with cold water allows the eggs to heat gradually, reducing stress on the shells and promoting even cooking. Bring the pot to a gentle boil over medium-high heat, then immediately reduce the heat or turn it off, depending on your preferred method.
Once boiling, timing becomes everything. For fully set whites and creamy, non-chalky yolks, most eggs need about 9 to 11 minutes of cooking time after reaching a boil. Cooking longer than this causes proteins to tighten excessively, leading to rubbery whites and the familiar green-gray ring around the yolk. That discoloration is a reaction between sulfur in the white and iron in the yolk, a clear sign of overcooking - not a safety issue, but a texture and flavor problem.
As soon as the cooking time is complete, rapid cooling is essential. Transferring eggs immediately to an ice bath halts the cooking process, preserving the ideal texture. Cooling also causes the egg to contract slightly inside the shell, helping it separate from the membrane. Let the eggs sit in the ice bath for at least 5 to 10 minutes, ensuring they’re fully cooled before peeling or storing.
Peeling is where many people struggle, but technique makes all the difference. Gently cracking the shell all over and starting from the wider end - where the air pocket is located - makes peeling significantly easier. Peeling under running water or submerged in water helps loosen stubborn bits of shell and membrane. If the shell still clings, don’t force it; patience prevents tearing the egg white.
Some cooks swear by adding salt, vinegar, or baking soda to the cooking water. While these additions can slightly affect shell behavior or pH, they are far less important than proper timing and cooling. The most consistent results come from temperature control and an ice bath rather than kitchen hacks.
Once cooked and peeled, hard boiled eggs should be stored properly. Unpeeled eggs can be kept in the refrigerator for up to a week, while peeled eggs should be stored in an airtight container with a damp paper towel to prevent drying out. Proper storage maintains flavor and texture, making them ready for quick meals and snacks.
Perfect hard boiled eggs are the result of understanding a few key principles: gentle heat, precise timing, and rapid cooling. With these techniques, you can achieve smooth, easy-to-peel eggs with tender whites and creamy yolks every single time. Whether you’re prepping for the week, making deviled eggs, or topping a salad, mastering hard boiled eggs is a small skill that delivers big rewards.
Latest