How to Make Fruit Tarts with Shiny Glaze Like a Bakery
Creating fruit tarts with a shiny, bakery-quality glaze is easier than you think when you understand the right techniques. From crisp, buttery crusts to silky pastry cream and perfectly arranged fresh fruit, every element plays a role in achieving that professional look. Mastering these steps ensures your homemade tarts are as visually stunning as they are delicious.
Fruit tarts are a timeless dessert, combining crisp pastry, smooth pastry cream, and the vibrant beauty of fresh fruit. But what separates a homemade tart from a bakery-level masterpiece isn’t just taste - it’s the shine. That glossy finish, often called nappage, is what makes fruit tarts irresistible, catching the eye and enhancing flavor. Achieving this professional look at home is entirely possible once you understand the techniques behind each component: the crust, the filling, the fruit arrangement, and the glaze.
The foundation of any fruit tart is its crust, typically a pâte sucrée or sweet shortcrust pastry. A well-made crust is firm enough to hold the filling, yet tender and crumbly to provide the perfect bite. Start by combining cold butter with sugar and flour, working quickly to prevent the fat from warming. Cold butter creates pockets in the dough that produce a delicate, flaky texture. After mixing, chill the dough thoroughly before rolling it out. Blind baking - baking the crust before adding filling - is essential to avoid soggy bottoms. Lining the tart pan with parchment and filling it with pie weights or dried beans ensures the crust maintains its shape and bakes evenly. The goal is a golden, crisp shell with uniform thickness, providing the ideal canvas for the cream and fruit.
The next layer is the pastry cream, or crème pâtissière, which acts as the rich, silky base for the fruit. This custard is made by gently heating milk, sugar, eggs, and cornstarch, whisking continuously to prevent lumps and achieve a smooth, creamy consistency. Vanilla is the classic flavoring, but subtle enhancements like lemon zest, almond extract, or even a touch of liqueur can elevate the flavor. Once cooked, the cream should be strained to remove any small curdles, then cooled to room temperature before filling the tart shell. Chilling the cream ensures it sets properly and provides stability for the delicate fruit that will sit atop it.
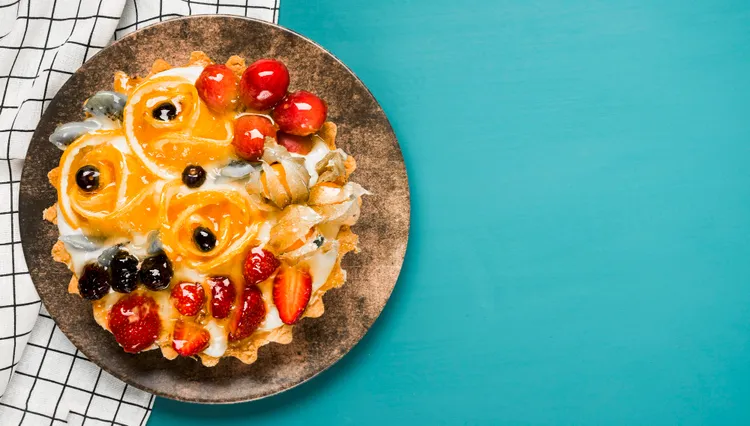
Fruit selection and arrangement are where your tart starts to look like a professional pastry. Seasonal fruit is ideal: berries, kiwi, stone fruit, or thinly sliced apples or pears create visual interest and balance. Wash and dry fruit carefully to avoid excess moisture, which can make the tart soggy or cause the glaze to run. Arrange the fruit in overlapping circles, rows, or artistic patterns, keeping in mind color contrast and symmetry. This step requires patience - beautifully arranged fruit creates the wow factor that immediately draws attention.
The final step - and the secret to that bakery-like finish - is the glaze. A shiny glaze not only adds visual appeal but also locks in freshness. Common choices include apricot jam, neutral fruit glaze, or a simple sugar syrup. To apply, gently heat the glaze to make it fluid, then strain it to remove any lumps. Using a pastry brush, coat the fruit evenly, starting with the edges and working inward. A thin, even layer is enough to create a mirror-like shine without overwhelming the fruit or making it soggy. For best results, glaze the tart just before serving to maintain maximum gloss and freshness.
Temperature control plays a critical role throughout the process. Cold dough ensures a crisp crust, properly cooled cream prevents collapse, and a warm glaze spreads smoothly without damaging the fruit. Precision in timing and handling guarantees that each element complements the others, resulting in a tart that’s visually stunning and deliciously balanced.
A professional-looking fruit tart is not just about following a recipe - it’s about understanding how each component behaves and interacts. From the crisp, tender crust to the creamy custard and perfectly glazed fruit, each step contributes to the final product. With practice, these techniques become second nature, allowing you to create tarts that are as beautiful as they are delectable. When done right, homemade fruit tarts rival anything in a bakery showcase, impressing guests with their flavor, texture, and undeniable visual appeal.
Latest