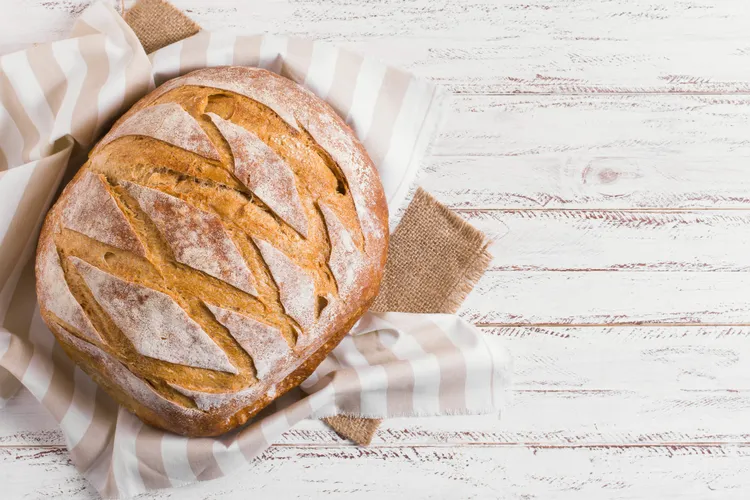
The Complete Beginner's Guide to Baking Bread at Home (From Zero to Your First Loaf)
Have you ever pulled a golden, crackling loaf out of the oven and thought - I can't believe I actually made that? That moment is closer than you think.
Baking bread at home sounds intimidating. But here's the truth: bread is one of humanity's oldest foods, made long before electric mixers, digital thermometers, or fancy Dutch ovens existed. If our ancestors could do it over an open fire, you can absolutely do it in your kitchen this weekend.
This beginner's guide to baking bread covers everything you need - from understanding your ingredients to pulling your first perfect loaf out of the oven. No fluff, no overwhelm. Just the essentials that actually work.
Why Baking Bread at Home Is Worth It
Store-bought bread often contains preservatives, dough conditioners, and up to 30 ingredients you can't pronounce. Homemade bread? Four ingredients: flour, water, yeast, and salt.
Beyond what's in it, homemade bread is cheaper. A basic loaf costs roughly $0.50-$1.00 to make at home versus $4-$7 at the grocery store. Bake twice a week and you're saving hundreds of dollars a year.
But the real reason bakers keep coming back? It's deeply satisfying. There's something almost meditative about working dough with your hands, watching it rise, and filling your home with that unmistakable smell.
The 5 Essential Tools (You Probably Already Have Most)
You don't need a professional bakery setup. Here's what actually matters:
- A large mixing bowl - the bigger, the better for kneading
- A loaf pan (9x5 inch) - or a baking sheet for free-form loaves
- A kitchen scale - bread baking is precision work; weight beats volume every time
- A clean kitchen towel or plastic wrap - for covering dough while it proofs
- A Dutch oven (optional but excellent) - traps steam for a crispier crust
Tip: If you don't have a Dutch oven, place a shallow pan of boiling water on the bottom rack of your oven when you start baking. The steam mimics the effect and dramatically improves your crust.
For a detailed breakdown of what's worth buying, see our guide: The Only 5 Tools You Need to Start Baking Bread at Home.
Understanding the 4 Ingredients in Bread
Flour: The Foundation
Most beginner recipes use bread flour or all-purpose flour. Bread flour has a higher protein content (12-14%) which develops more gluten, giving your loaf better structure and chew. All-purpose flour (10-12% protein) works fine for beginners and produces a slightly softer crumb.
Whole wheat flour adds flavor and nutrition but absorbs more water - don't swap it 1:1 with white flour without adjusting your liquid.
Unsure which flour to buy first? Read our deep-dive: Which Flour Should You Use for Bread?
Yeast: The Living Engine
Yeast is what makes bread rise. It eats sugars in the flour and releases carbon dioxide gas, which gets trapped in the dough and creates all those beautiful air bubbles.
Two types you'll encounter:
- Active dry yeast - needs to be "proofed" (dissolved in warm water) before use
- Instant yeast - can be mixed directly into dry ingredients; slightly faster acting
Both work. Instant yeast is more forgiving for beginners. Water temperature matters: aim for 100-110°F (38-43°C). Too hot kills the yeast. Too cold and it won't activate.
Learn more: Active Dry vs. Instant Yeast: What's the Difference?
Salt: More Than Just Flavor
Salt does three things: it enhances flavor, controls the fermentation rate, and strengthens gluten structure. Bread without salt tastes flat and ferments too fast.
Standard ratio: 1.8-2% of your flour weight. For a 500g flour recipe, that's about 9-10g of salt (roughly 1.5 teaspoons).
Water: The Variable
Hydration level - the ratio of water to flour - changes everything about a loaf. Beginner recipes typically use 60-70% hydration (300-350g water per 500g flour). Higher hydration doughs are wetter, stickier, and produce a more open crumb, but they're harder to shape.
Start with 65% hydration. Master that, then experiment.
The Bread-Baking Process: Step by Step
Step 1: Mix
Combine your ingredients until no dry flour remains. A shaggy, rough mass is perfectly normal at this stage. Let it rest for 20-30 minutes - this is called autolyse, and it begins gluten development without any effort from you.
Step 2: Knead
Kneading develops gluten - the protein network that gives bread its structure and chew. Push the dough away with the heel of your hand, fold it back, rotate, repeat. After 8-10 minutes by hand (4-5 minutes in a stand mixer), the dough should be smooth, elastic, and slightly tacky but not sticky.
The windowpane test: stretch a small piece of dough between your fingers. If it stretches thin enough to let light through without tearing, your gluten is developed. If it tears immediately, keep kneading.
Read the full technique breakdown: How to Knead Bread Dough Properly
Step 3: First Proof (Bulk Fermentation)
Place the dough in a lightly oiled bowl, cover, and let it rise at room temperature until doubled in size. This typically takes 1-2 hours at 70-75°F (21-24°C).
Don't rush this with excessive heat. Slow fermentation builds better flavor. An overnight cold ferment in the fridge (8-12 hours) produces noticeably more complex, delicious bread.
Common Mistake 1: Letting dough over-proof. If it more than doubles and starts looking bubbly or deflated, it's gone too far. The gluten structure weakens and your loaf won't hold its shape. Learn the signs: How to Tell When Your Bread Dough Has Proofed Enough
Step 4: Shape
Gently turn the dough onto a lightly floured surface. For a basic sandwich loaf, flatten it into a rough rectangle, fold the sides in, then roll it tightly toward you into a log. Place it seam-side down in a greased loaf pan.
Step 5: Second Proof
Cover and let rise again for 45-60 minutes, until the dough crowns about an inch above the rim of the pan. Preheat your oven to 375°F (190°C) during this time.
Step 6: Bake
Bake for 30-35 minutes until deep golden brown. The internal temperature should reach 190-200°F (88-93°C) - a thermometer takes the guesswork out entirely.
Common Mistake 2: Cutting into the bread too soon. The crumb is still setting as the loaf cools. Wait at least 30 minutes (ideally an hour) before slicing or you'll get a gummy texture.
Your First Recipe: Simple White Sandwich Bread
Makes: 1 loaf | Total Time: ~3.5 hours (mostly hands-off)
Ingredients:
- 500g (4 cups) bread flour
- 325g (1⅓ cups) warm water (100-110°F)
- 7g (2¼ tsp) instant yeast
- 9g (1½ tsp) salt
- 15g (1 tbsp) olive oil or softened butter
Method:
- Whisk yeast into warm water. Add flour, salt, and oil. Mix until combined.
- Knead 8-10 minutes by hand until smooth and elastic.
- Cover and proof 1-2 hours until doubled.
- Shape, place in greased 9x5 loaf pan, proof 45-60 minutes.
- Bake at 375°F (190°C) for 30-35 minutes until golden and internal temp hits 195°F.
- Cool 30-60 minutes before slicing.
Troubleshooting: When Things Go Wrong
Dense, heavy loaf? Yeast was dead or water was too hot. Always proof your yeast first if unsure.
Loaf didn't rise? Either the yeast is inactive, the dough was too cold, or it was over-kneaded.
Gummy interior? Under-baked, or you cut it too soon. Use a thermometer.
Crust too pale? Tent with foil for the last 10 minutes or increase oven temp by 25°F.
For a full troubleshooting guide: Why Did My Bread Not Rise? 7 Reasons and Easy Fixes
Frequently Asked Questions
Q: Can I bake bread without a stand mixer? Absolutely. Bread was made by hand for thousands of years. Hand-kneading takes 8-10 minutes and is completely effective. A stand mixer just saves effort.
Q: How do I store homemade bread? Store cut-side down on a cutting board or in a paper bag at room temperature for 2-3 days. For longer storage, slice and freeze - homemade bread freezes beautifully for up to 3 months.
Q: Can I substitute whole wheat flour? Yes, but start by replacing no more than 25-30% of the white flour with whole wheat. Whole wheat absorbs more water, so add an extra tablespoon or two of water to keep the dough workable.
Q: Why is my bread dough so sticky? Sticky dough is normal - especially at higher hydration. Resist adding more flour unless the dough is completely unworkable. A little stickiness produces a more tender loaf. Wet your hands instead of flouring them.
Q: Do I need to use a Dutch oven? No. It helps create a crispier crust through steam, but a regular baking sheet or loaf pan works fine. Use the steam pan trick mentioned in the tools section as an alternative.
Q: How long does homemade bread take from start to finish? Most beginner recipes take 3-4 hours total, but only about 30-40 minutes of that is active work. The rest is just waiting while the dough does its thing.
Start Baking Today
The best way to learn bread baking is to make your first loaf - even if it's imperfect. Every baker has stories of dense hockey pucks and flat disasters. It's part of the process.
Make the simple white sandwich bread above this weekend. Take notes. Notice how the dough feels, how it smells as it proofs, how it sounds when you tap the bottom of a fully baked loaf (hollow = done).
Then try our No-Knead Overnight Bread for a completely different - and arguably even easier - approach.
Got questions? Drop them in the comments below. Snap a photo of your first loaf and share it - we want to celebrate every single one, cracks, lopsided crusts and all.
Continue your bread baking journey:
- Which Flour Should You Use for Bread?
- How to Knead Bread Dough Properly
- No-Knead Overnight Bread Recipe
- Why Did My Bread Not Rise? 7 Reasons and Easy Fixes
- The Only 5 Tools You Need to Start Baking Bread
Latest