Why Your Cake Layers Are Crooked - And How to Level Them Easily
Crooked cake layers can ruin the look and stability of your homemade cakes, but the problem is usually easy to fix with the right techniques. From understanding oven temperature and batter behavior to using leveling tools and proper slicing methods, you can achieve straight, even layers every time. Mastering these tips ensures your cakes look professional and bake evenly, making stacking and decorating a breeze.
Few things are more frustrating than carefully baking cake layers only to discover they’re lopsided, uneven, or crooked. Uneven cake layers not only affect presentation but also make stacking, frosting, and decorating more difficult. The good news is that crooked layers are rarely caused by bad luck - they’re usually the result of simple baking science and technique, all of which can be corrected with a few straightforward methods. Understanding why cake layers bake unevenly and how to level them properly will transform your homemade cakes from amateur to professional-quality.
One of the main reasons cake layers become crooked is oven temperature and heat distribution. Hot spots or uneven heating can cause cakes to rise more on one side than the other. Convection ovens tend to bake more evenly, while traditional ovens often require rotating the pans halfway through baking. Checking your oven with an inexpensive oven thermometer can reveal inconsistencies that affect cake rise. For batter that’s prone to uneven rising, using an oven strip - a fabric strip soaked in water and wrapped around the cake pan - helps insulate the edges, ensuring a more uniform rise.
Improper pan preparation is another common culprit. Cakes baked in warped or uneven pans, or those not properly greased and lined, can bake with sloped edges. Using quality, heavy-duty round cake pans and ensuring they are level on the oven rack prevents tilting and uneven rising. Some bakers also recommend placing a baking sheet underneath pans to add stability and promote more even heat distribution.
The batter itself can influence how straight your layers bake. Overmixing causes excess air bubbles and uneven texture, while undermixing leads to dense spots that rise inconsistently. Lighter batters, like sponge or chiffon cakes, are particularly sensitive and need gentle folding to preserve air while ensuring even hydration of ingredients. For multi-layer cakes, dividing the batter evenly between pans and smoothing the surface with a spatula before baking helps minimize peaks and valleys.
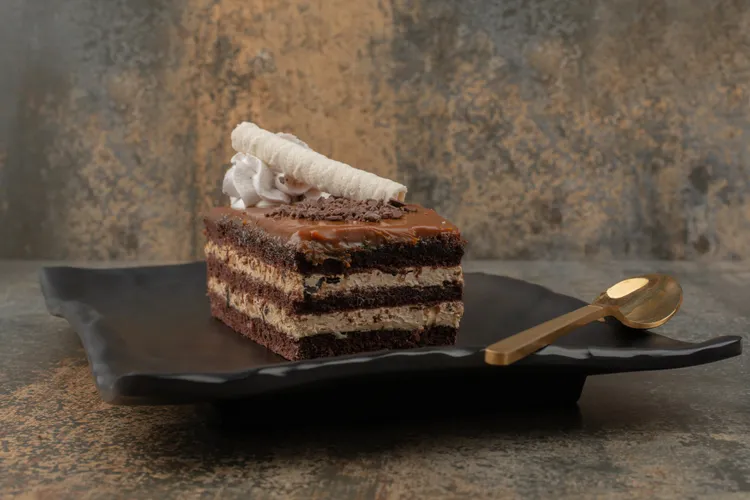
Once a cake is baked, leveling the layers is the key to professional-looking results. The simplest method is using a long serrated knife or cake leveler. Place the cake on a flat surface, rotate it slowly, and slice off the dome to create a flat top. For best results, chill the cake in the refrigerator for 20-30 minutes beforehand - firmer cakes are easier to cut cleanly without tearing.
For bakers looking for a foolproof method, a cake leveler tool provides consistent results. These adjustable tools ensure perfectly even layers and are especially useful when stacking multiple tiers. Some advanced bakers even use kitchen string or dental floss for a hands-on approach: holding it taut at the desired height and slicing through the cake produces surprisingly precise results.
When assembling multi-layer cakes, it’s essential to check that each layer sits flat before adding filling or frosting. A slight tilt in one layer can compound as you stack, leading to a noticeably crooked cake. Using a bit of frosting or buttercream between layers as a “shim” helps stabilize and adjust small uneven spots, ensuring the final cake is level and visually appealing.
Even with careful leveling, cake handling during assembly can cause layers to shift. Using a turntable during frosting, supporting the cake with dowels for taller tiers, and chilling between steps can prevent accidental tilting. Proper storage and gentle movement are especially important for delicate cakes with soft fillings.
Crooked cake layers are a common challenge, but they are completely solvable with the right combination of preparation, baking technique, and leveling tools. From understanding oven heat, batter behavior, and pan quality to employing proper slicing and assembly methods, each step contributes to straight, professional-looking layers. With practice and attention to detail, even homemade cakes can look polished, balanced, and bakery-worthy, giving you confidence in both taste and presentation.
Latest