Indian Pani Puri: The Street Food That Explodes in Your Mouth
The most theatrical street food in the world - and everything you need to make it at home
There is a street food that requires you to eat it in a single bite. Not because it is polite to do so. Not because the portions are small. Because the entire architecture of the dish depends on it - because the hollow crispy shell, filled to the absolute brim with spiced potato and chickpeas and then drowned in icy, tangy, mint-green water, cannot be held for more than a second before the shell softens, the water spills, and the moment is lost.
Pani puri is eaten in one complete, uncompromising bite. The shell shatters. The water fills your mouth instantly - icy cold, simultaneously sour and salty and spicy and sweet, with the tamarind and black salt and chaat masala arriving in a sequence that takes less than three seconds and somehow contains the flavor of an entire meal. Then the spiced potato and chickpea filling, still slightly firm, grounding everything.
It is one of the great eating experiences in the world. It is the street food that appears most consistently on lists of "foods you must eat before you die." It is sold by vendors who stand behind a tray of pre-filled shells, handing them to customers one at a time so that each is eaten the moment it is received, never waiting, the sequence unbroken.
And it is entirely achievable at home - with one important acknowledgement: the hollow shell is a technique, not an accident. The puri that puffs into a perfect sphere with a hollow interior requires the right dough, the right thickness, and the right oil temperature. It takes a few attempts to master. Once mastered, it cannot be unmade - you will make pani puri regularly for the rest of your life.
This guide teaches everything: the puri, the three waters, the filling, the assembly, and the regional variations that reveal how differently India approaches the same essential idea across its cities.
📖 The semolina and black salt are essential. Fine semolina (sooji/rava) is what produces the hollow puff in the puri - plain flour alone doesn't work. Black salt (kala namak) is what makes the water taste like pani puri water rather than flavoured water. Both are available at South Asian grocery stores and online. Before you start: South Asian Street Food Pantry covers every ingredient in this recipe.
The Names: Why Pani Puri Has Four Identities
Pani puri is the same dish known by different names across India - a reflection of the country's linguistic and regional diversity rather than any meaningful difference in the dish itself.
Pani puri - Maharashtra, Gujarat, and most of western India. The most internationally recognised name. Pani means water; puri means fried bread.
Golgappa - Delhi and most of northern India. Gol means round; gappa means mouthful.
Puchka - West Bengal and Bangladesh. A Bengali word with no direct translation but understood immediately by anyone who has eaten one.
Gupchup - Odisha and parts of Jharkhand and Chhattisgarh.
The shell, the water, the filling - all vary slightly by region. This recipe focuses on the western Indian (Mumbaikar) version, which is the most internationally known and uses the tamarind-mint water that has become the default outside India. Regional variations are covered at the end.
The Three Components: Understanding the Architecture
The Puri (The Shell)
The puri is the technical challenge and the defining characteristic of pani puri. It must:
- Be perfectly hollow - a thin, crispy sphere with a cavity large enough to hold the filling and water
- Shatter cleanly when pressure is applied with a thumb to make the filling hole - not crack randomly, not collapse entirely
- Remain crispy until the moment it is filled - then be eaten immediately
This requires:
- Fine semolina as the primary flour - the semolina's coarse particles create the structure that allows steam to form a hollow during frying. Plain flour alone produces a flat, dense puri that doesn't puff.
- Exact thickness - too thick and the steam can't create a hollow; too thin and the puri collapses or breaks before it sets
- Correct oil temperature - 165-170°C. Too hot and the puri burns before it puffs; too cold and it soaks oil rather than forming a crust
The Pani (The Water)
The pani is the soul of the dish. Two versions are traditional:
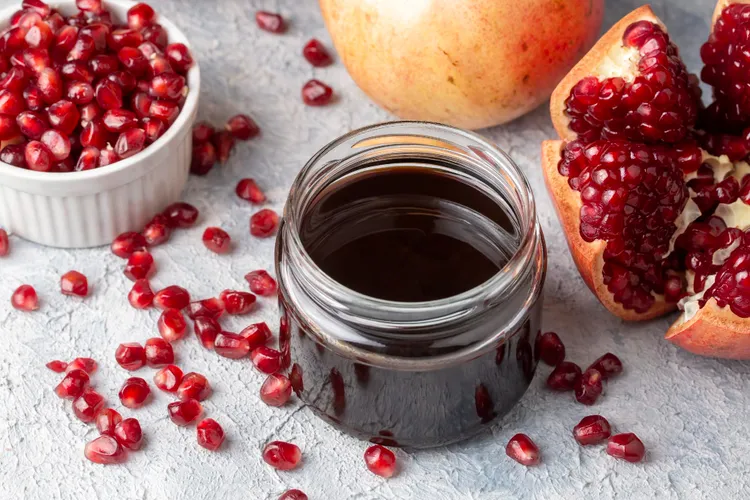
Teekha pani (spicy green water): Blended fresh mint, coriander, green chili, and ginger, strained and seasoned with tamarind, black salt, chaat masala, and roasted cumin. Icy cold. Electric green. Intensely flavored.
Meetha pani (sweet water): Tamarind and jaggery, simmered with dried ginger powder and black salt. Dark, sweet, slightly sour. Served alongside the teekha pani or mixed in various proportions by each diner.
The combination of both waters - most diners prefer one or a mixture - allows each person to calibrate the flavor balance to their own preference.
The Filling
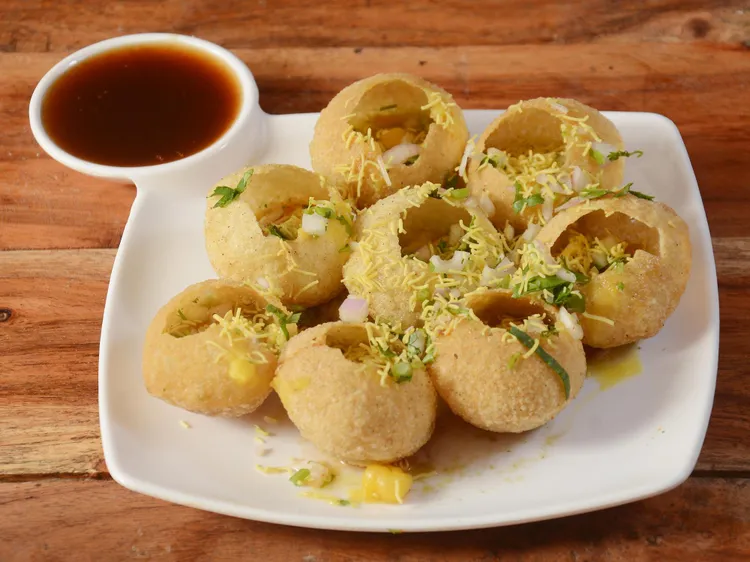
The filling grounds the experience - without it, pani puri is just flavored water in a crispy shell. The classic filling is spiced boiled potato and chickpeas, seasoned with chaat masala and black salt, with optional additions of sprouted mung beans or finely chopped onion.
Ingredients
Makes approximately 30-35 puri | Serves 4-6 | Active time: 45 minutes
The Puri Dough
- 150g fine semolina (sooji / fine rava - not coarse semolina) - the critical ingredient
- 50g plain flour (maida), sifted - provides structure alongside the semolina
- ½ tsp fine sea salt
- ½ tsp bicarbonate of soda - produces very fine bubbles that contribute to the hollow puff
- 75-85ml warm water - added gradually; the exact amount depends on the semolina brand
Oil for frying: Sunflower or vegetable oil, enough to fill your frying vessel one-third (approximately 1.5 litres), heated to 165-170°C
The Teekha Pani (Spicy Green Water)
- Large bunch fresh mint (about 40g), leaves only
- Large bunch fresh coriander (about 40g), leaves and tender stems
- 2–3 small green chilies (bird's eye or serrano) - adjust to heat preference; seeds in for full heat
- 2cm piece fresh ginger, peeled and roughly chopped
- 3 tbsp tamarind paste - not concentrate
- 1.5 tsp black salt (kala namak) - non-negotiable for authentic flavor
- 1 tsp chaat masala - recipe at Pakistani Chaat Masala guide or shop-bought
- 1 tsp roasted cumin powder (dry-toast 1 tsp whole cumin seeds, grind)
- 1 tsp caster sugar - balances the tartness
- 750ml ice-cold water
- Juice of 1 lime
- Ice - for serving
The Meetha Pani (Sweet Tamarind Water)
- 4 tbsp tamarind paste
- 3 tbsp jaggery or dark brown sugar
- ½ tsp black salt
- ½ tsp dried ginger powder
- ¼ tsp roasted cumin powder
- 500ml cold water
The Filling
- 300g waxy potatoes (Charlotte or new potatoes), boiled until just cooked, cooled, and cut into 1cm cubes
- 200g canned chickpeas, drained and rinsed
- 1 tsp chaat masala
- ½ tsp black salt
- ½ tsp roasted cumin powder
- ¼ tsp red chili powder
- Juice of ½ lime
- Small handful fresh coriander, finely chopped
- Optional: 100g sprouted mung beans - adds crunch and nutrition
- Optional: ½ small white onion, very finely diced
Method
Step 1: Make the teekha pani (15 minutes + chilling)
Blend mint, coriander, green chilies, and ginger with 100ml of the cold water until completely smooth. Strain through a fine mesh sieve, pressing to extract all the liquid. Discard the pulp.
Combine the strained green liquid with the remaining cold water, tamarind paste, black salt, chaat masala, roasted cumin, sugar, and lime juice. Stir thoroughly. Taste - the water should be simultaneously sour, salty, spicy, and herbal, with the black salt providing its characteristic sulfurous depth. Adjust: more tamarind for sourness, more black salt for depth, more chili for heat, more sugar for balance.
Refrigerate for at least 1 hour before serving - the pani must be very cold when served. Add a generous amount of ice just before serving to keep it at near-freezing temperature.
Step 2: Make the meetha pani (5 minutes)
Combine all ingredients in a small saucepan. Heat gently until the jaggery dissolves, stirring continuously. Do not boil. Cool completely and refrigerate. The meetha pani should be quite sweet, moderately sour, with the black salt providing an earthy undertone.
Step 3: Make the filling (10 minutes)
Combine cubed potatoes and chickpeas in a bowl. Add chaat masala, black salt, cumin, chili powder, and lime juice. Toss gently to coat evenly - do not mash; the potatoes should be intact cubes. Fold in coriander, sprouted mung beans, and onion if using. Taste and adjust seasoning. The filling should be bold - it will be diluted by the pani water in the final dish.
Cover and refrigerate until needed.
Step 4: Make the puri dough (5 minutes + 20 minutes resting)
Combine fine semolina, plain flour, salt, and bicarbonate of soda in a large bowl. Mix well with your hands. Add warm water gradually - start with 75ml and add more as needed - mixing as you go. The dough should come together into a smooth, firm ball that is not sticky and does not crack when pressed. It should be noticeably stiffer than a bread dough - almost as firm as a firm shortcrust pastry.
The firmness is critical. A soft, yielding dough produces flat puri. A firm dough produces puri with enough structural integrity to trap steam and puff hollow. If the dough feels soft, add a tablespoon of semolina and knead to incorporate.
Knead for 3-4 minutes until very smooth. Cover with a damp cloth and rest for 20 minutes. The resting allows the semolina to fully hydrate and the gluten to relax, making rolling easier.
Step 5: Roll and cut the puri
Divide the rested dough into two equal pieces. Work with one at a time, keeping the other covered.
On a very lightly floured surface, roll the dough to a uniform thickness of 2-2.5mm - very thin, but not translucent. This thickness is the most critical variable in puri-making. Too thick (3mm+): the puri won't puff hollow, or the hollow will be small. Too thin (1.5mm or less): the puri is fragile and bursts before it can set.
Measuring without a ruler: The dough at the correct thickness should feel like thick cardstock when a piece is held up. You should be able to see your fingers through it very faintly if held to light.
Cut rounds using a 5-6cm round cutter (or the mouth of a glass). A 5cm diameter produces street-vendor sized puri - the correct size for a one-bite experience. Larger puri are harder to eat in one go.
Collect the scraps, re-knead briefly, and re-roll. All the dough should be used.
Cover the cut rounds with a damp cloth while working - exposed rounds dry out and don't puff.
Step 6: Fry the puri - the critical step
Heat oil to 165-170°C in a deep, heavy-based pan. See How to Fry Like a Street Food Vendor for the complete guide.
The test puri: Before frying the full batch, fry one puri. It should:
- Sink immediately when placed in the oil
- Begin to float and puff within 5-10 seconds
- Rotate in the oil as it puffs, pushed by the steam inside
- Reach a fully rounded, hollow sphere within 30-40 seconds
- Be golden (not dark brown) when done - approximately 60-90 seconds total
If it doesn't puff: The oil is too cold (increase temperature), the dough is too thick (roll thinner), or the dough is too soft (add more semolina to the remaining dough). Address the issue before frying the full batch.
If it burns before puffing: The oil is too hot (reduce temperature).
Frying technique: Lower 3-4 puri at a time into the oil using a spider. As each one begins to puff, use the spider to gently press it just below the oil surface - this encourages the steam to distribute evenly and produces a more uniform sphere. Do not press hard enough to deflate. The puri will puff on their own; the gentle pressure simply helps with symmetry.
Fry for 60-90 seconds total until golden and crispy. Remove with the spider and drain on a wire rack. They will be perfectly hollow and will sound hollow when tapped - like a tiny drum.
Fry in batches, allowing the oil to return to temperature between each batch.
Step 7: Cool and store the puri
Allow fried puri to cool completely on the wire rack before storing. Warm puri trap steam and soften if stored immediately. Once completely cool, store in an airtight container at room temperature for up to 1 week. They maintain their crispness well.
Never refrigerate fried puri. The humidity of the fridge softens them irreversibly.
Assembly: The Pani Puri Experience
Pani puri is not plated. It is assembled and eaten in real time - each puri filled at the moment it is to be eaten, handed to the diner, consumed immediately, and immediately followed by the next.
The vendor technique:
- Hold a puri in your palm, dome side down
- With your thumb, press firmly and quickly into the centre of the flat base - the shell should crack cleanly, creating a hole approximately 2cm in diameter. If it crumbles, the puri is undercooked or the dough was too thin. If it won't crack without shattering the whole shell, the puri is overfried.
- Fill the cavity with approximately 1 teaspoon of the potato-chickpea mixture
- Drown with teekha pani - fill to just below the rim, cold and generous
- Hand to the recipient immediately
- They eat it in one complete bite
At home: Set up the components on the table - the puri in a bowl, the filling in a separate bowl, the pani in a jug with ice alongside. Guests can assemble their own (slightly less authentic, slightly more relaxed) or you can play vendor, filling one at a time and handing them out in sequence.
The ratio: The pani should flood the cavity generously - the shell should be almost overflowing. This is not restraint food. The shell, the filling, and the water should arrive in the mouth simultaneously.
The Regional Variations
Mumbai Pani Puri
The teekha pani described in this recipe - mint-coriander, tamarind, black salt, icy cold. The filling is potato-chickpea with sprouted mung beans. The puri is thin-shelled and very crispy.
Delhi Golgappa
Slightly larger shells. The pani uses black pepper more prominently and less mint. Often served with a meetha pani (sweet tamarind water) alongside the spicy version, letting diners mix. The filling includes finely chopped onion and coriander.
Kolkata Puchka
Distinctly different - the pani uses a more aggressive tamarind base with less mint, and the filling typically includes spiced mashed potato (aloo dum style) with mustard oil. The puri is slightly thicker and chewier than the western Indian version.
Aloo Chaat Pani Puri
The filling is replaced with a more elaborate aloo chaat preparation - the potato is spiced with all the chaat masala components, plus tamarind chutney and green chutney drizzled directly into the shell before the water. A more complex flavor per bite.
Dahi Puri (Without Water)
A variation where the puri is filled with potato and chickpeas, then topped with yogurt, tamarind chutney, green chutney, sev, and chaat masala - no water. A different dish entirely (the puri is not dunked, the yogurt is the liquid element), but made with the same shells.
Serving a Pani Puri Party
Pani puri is the ideal format for an Indian-themed gathering - interactive, theatrical, and able to be extended for as long as guests want to keep eating.
For 8 people:
- Make 60-70 puri (1.5x the recipe)
- Make double quantities of both pani versions
- Double the filling
- Have extra chaat masala and black salt on the table for guests to adjust their water
The spread:
- Teekha pani in a tall jug with plenty of ice
- Meetha pani in a separate jug
- Filling in a large bowl with a small spoon
- Puri in a wide shallow bowl
- Extra sev for scattering
- Tamarind chutney alongside
The experience: The theatrical element of pani puri - the one-at-a-time eating, the explosion of flavor, the refilling sequence - makes it the ideal centrepiece for a gathering. It requires engagement and produces delight in almost everyone who encounters it for the first time.
Storing and Making Ahead
Puri: Fry up to 1 week ahead. Store in an airtight container at room temperature. Do not refrigerate.
Teekha pani: Make 1-2 days ahead. The flavors deepen significantly after 24 hours. Refrigerate; add ice just before serving.
Meetha pani: Make up to 1 week ahead. Refrigerate in a sealed jar.
Filling: Make up to 24 hours ahead. Refrigerate covered. Re-season before serving - the flavors mute slightly in the cold.
The full make-ahead strategy: Make everything 1-2 days before a party. On the day, all you do is pull components from the fridge, ice the teekha pani, and set up the table. The most complex-seeming dish in this collection becomes a 10-minute day-of setup with advance preparation.
Troubleshooting
The puri are not puffing. Three possible causes: (1) Oil temperature too low - bring to 165°C and test again. (2) Dough too thick - roll to 2-2.5mm. (3) Dough too soft - the semolina content is insufficient. Add 1 tbsp semolina to the remaining dough, knead to incorporate. Soft dough cannot trap steam effectively.
The puri are puffing but collapsing immediately. The dough is too thin - the shell sets before the structure is firm enough to maintain the hollow. Roll slightly thicker and try again.
The puri are dark brown rather than golden. Oil temperature too high. Reduce to 165°C and allow to stabilise before the next batch.
The puri are absorbing oil and coming out greasy. Oil temperature too low. Greasy puri are always a temperature problem - the steam barrier fails when the oil can't immediately set the surface. Increase temperature and test.
The pani tastes flat despite following the recipe. Almost always the black salt - it has been omitted, used in insufficient quantity, or a poor quality version was used. Add another ½ tsp, stir, and taste. The sulfurous depth of kala namak is what makes pani puri water taste like pani puri water.
Pro Tips
- The dough must be firm. This bears repeating because it contradicts every instinct built from bread-making and pasta-making. Firm dough for puri means hollow puri. Soft dough means flat puri. When in doubt, add more semolina.
- Rest the dough for the full 20 minutes. Unrested dough springs back when rolled, making it impossible to achieve the uniform thin thickness needed. The resting relaxes the gluten and makes the dough compliant.
- Fry the test puri before committing the batch. One puri costs thirty seconds. Finding out the temperature is wrong on the first test puri rather than the first ten is the most efficient possible use of that time.
- The pani must be very cold. Room-temperature pani puri water is a different and lesser experience. The ice-cold temperature is part of the flavor - the cold amplifies the mint and tamarind and makes the explosion of flavor more dramatic. Make the pani ahead and chill thoroughly.
- Make extra puri. They keep for a week and can be used for dahi puri, bhel puri, or eaten plain as a snack. A double batch of puri requires only slightly more effort than a single batch and is almost always worth it.
Common Mistake: Using Coarse Semolina Instead of Fine Coarse semolina (also sold as semolina or durum semolina for pasta-making) does not produce the same result as fine sooji/rava in puri dough. The coarser particles don't bind as tightly, producing a puri that is dense and doesn't puff hollow, or that is fragile and crumbles when the filling hole is made. Buy fine sooji specifically - it is labeled "fine rava" or "fine sooji" at South Asian grocery stores and is a different product from the semolina used in Western baking. See South Asian Street Food Pantry for the full guide.
FAQ
Q: Why won't my puri puff no matter what I do?
Work through this checklist in order: (1) Is the semolina fine (not coarse)? (2) Is the dough firm enough - does it feel like stiff pastry? (3) Is the dough rolled to exactly 2-2.5mm? (4) Is the oil at 165-170°C - measured with a thermometer, not estimated? (5) Are the rounds being fried within a few minutes of cutting? A "no" to any of these is the cause. The most common culprit is a combination of slightly too soft dough and slightly too low oil temperature.
Q: Can I make puri in an air fryer?
The results are significantly inferior - air-fried puri don't puff the same way and have a different texture. The hollow sphere formation depends on the specific heat transfer of submersion in hot oil, which air frying cannot replicate. Frying is the correct method; the frying guide makes it straightforward.
Q: Is pani puri vegan?
The classic recipe is entirely vegan - semolina and flour puri, potato-chickpea filling, herb and tamarind water. Dahi puri (the yogurt variation) is not vegan, but the standard pani puri is.
Q: How far in advance can I make the teekha pani?
Up to 48 hours - the flavor actually improves after 24 hours as the herbs and spices infuse more fully. After 48 hours the mint begins to lose its brightness. Make 1-2 days ahead for the best balance of convenience and flavor.
Q: My black salt smells very strong - is this normal?
Yes - black salt (kala namak) has a powerful sulfurous smell in the packet that can be alarming the first time. This is normal and correct. The smell mellows dramatically once diluted in the pani water and disappears almost entirely in the finished dish, leaving behind a savory, slightly mineral depth that is the defining flavor note of pani puri. Use the full measured amount.
🔗 Complete the Collection
- Pakistani Chaat Masala: The Spice Blend That Makes Everything Better
- South Asian Street Food Pantry: The Ingredients Behind the Flavor
- The Street Food Sauce Bible: 15 Sauces from 15 Countries - Tamarind Chutney, Raita
- How to Fry Like a Street Food Vendor: The Complete Home Guide
- How to Make Socca: The Chickpea Flatbread of the French Riviera - the chickpea flour connection
- Brazilian Coxinha: The Teardrop Croquette Everyone's Obsessed With
- The Perfect Arancini: Sicily's Greatest Street Food at Home
- 10 Street Food Dishes You Can Make in 30 Minutes or Less
- Global Street Food at Home: The Ultimate Guide
Latest