Brazilian Coxinha: The Teardrop Croquette Everyone's Obsessed With
The dough is the technique. Once you have it, everything else is assembly.
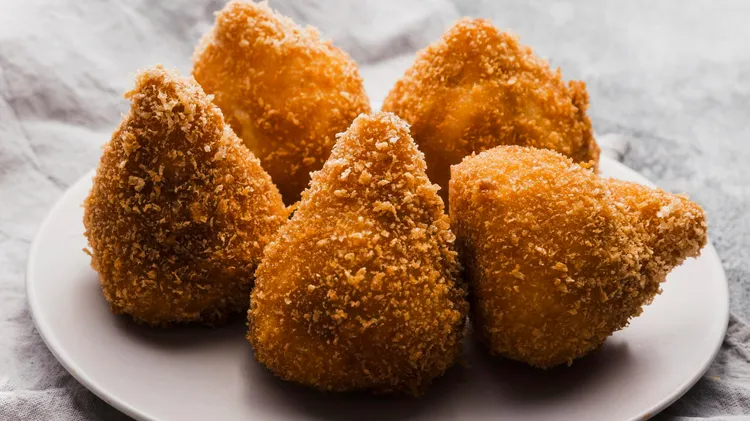
In every padaria (bakery) in Brazil, on every lanchonete (snack bar) counter, at every birthday party and school event and office gathering - there is coxinha. The teardrop-shaped croquette with shredded chicken and cream cheese inside, a smooth, slightly yielding dough outside, and a golden, crispy breadcrumb crust that shatters at the first bite before giving way to the creamy, savory filling.
Coxinha (pronounced ko-SHEEN-ya - "little thigh" in Portuguese, a reference to the drumstick shape it is meant to evoke) is Brazil's most beloved salgadinho - the broad category of small savory snacks that are the cornerstone of Brazilian party food culture. They appear at every gathering, always in quantity, always eaten standing, always disappearing faster than they were made.
The coxinha is not a difficult recipe. It is a patient one. The dough - a cooked mixture of chicken stock, flour, and sometimes potato or mandioca - requires attention and practice to get right, and the shaping takes the first few attempts before it becomes instinctive. But once the technique is understood, coxinha becomes one of those preparations that you can make in large batches, freeze, and pull out for any occasion - a skill that produces disproportionate delight relative to the effort involved.
This guide covers everything: the dough from scratch, the filling in two versions (classic chicken and a jackfruit vegan alternative), the shaping tutorial, the frying, and the freezer strategy that turns coxinha into a 20-minute weeknight triumph.
📖 Frying is the final step and the most technically demanding. Before you start, read How to Fry Like a Street Food Vendor: The Complete Home Guide. Oil temperature at 175-180°C is critical for coxinha - too low and the dough absorbs oil before the crust sets; too high and the exterior darkens before the interior heats through.
The History: From Royal Kitchens to Every Street Corner
The origin story most commonly told about coxinha involves the Brazilian royal family - specifically Princess Isabel, daughter of Emperor Dom Pedro II, who supposedly had a cook develop the dish in the 19th century to satisfy her son's craving for chicken drumsticks when only one was available. The cook shredded the meat from the single drumstick, wrapped it in dough shaped like a drumstick, and the coxinha was born.
Food historians are skeptical of this story - origin myths that involve royalty and clever servants tend to be retrospective inventions rather than documented history. What is more likely is that coxinha evolved from the Portuguese tradition of croquetes (croquettes), adapted by Brazilian cooks to local ingredients and local taste preferences, and spread through the padaria culture of São Paulo in the early 20th century. The specific potato-flour dough, the cream cheese filling, the teardrop shape - these are Brazilian adaptations, not Portuguese imports.
What is certain is that coxinha became the defining street food of São Paulo, spreading nationally from there, and that the debates about the correct dough (potato or plain flour, with chicken stock or milk, with or without egg) are as passionate and unresolvable as any in Brazilian food culture.
Understanding the Dough
The coxinha dough is unlike any other dough in this collection. It is not yeasted. It is not a pastry. It is a panada - a cooked dough made by bringing liquid to a boil, adding flour, and cooking the mixture until it forms a smooth, cohesive ball that pulls away from the sides of the pan. The same principle as choux pastry, but denser and less liquid.
The two dough styles:
Classic flour dough: Made with chicken stock and plain flour only. Lighter, with a cleaner flavor, and the most neutral vehicle for the filling. The technique is identical to making choux - boiling liquid + flour + cooking until the dough dries out slightly.
Potato dough (the São Paulo style): Mashed potato is incorporated into the dough, producing a slightly softer, more yielding texture that is often considered richer and more satisfying. The potato adds a subtle earthy flavor and a tenderness to the crust that the plain flour version doesn't have.
Both are provided here. The potato dough is our preference - but the plain flour dough is faster and entirely excellent.
Why the Dough Must Be Cooked
The cooking step - stirring the flour into boiling liquid and continuing to cook until the dough pulls from the pan - gelatinises the starch in the flour. This gelatinised starch is what gives the coxinha dough its ability to be shaped without cracking and to hold the filling without leaking during frying. Uncooked dough made from the same ingredients would be crumbly and fragile. The cooking is the structural step.
Ingredients
Makes approximately 20 coxinha
The Filling: Classic Shredded Chicken
- 2 boneless, skinless chicken breasts (about 400g) - poached and shredded
- 150g cream cheese, softened to room temperature
- 1 small white onion, very finely diced
- 3 cloves garlic, minced
- 2 tbsp extra virgin olive oil
- 1 tbsp tomato purée
- 1 tsp sweet paprika
- Large handful fresh flat-leaf parsley, finely chopped
- Salt and black pepper to taste
- Optional: 1 tbsp Catupiry - Brazil's iconic soft processed cheese; adds a specific creaminess that is traditional in coxinha across São Paulo. Available at Brazilian grocery stores; cream cheese is a very good substitute.
The Poaching Liquid (Becomes the Dough Liquid)
- 600ml water
- 1 small white onion, halved
- 2 cloves garlic, lightly crushed
- 1 bay leaf
- 1 tsp salt
The Dough: Plain Flour Version
- 500ml of the reserved poaching liquid from above (strain and measure after poaching chicken)
- 300g plain flour, sifted
- 1 tbsp unsalted butter
- ½ tsp salt
The Dough: Potato Version (São Paulo Style)
- 300ml of the reserved poaching liquid
- 200g floury potato (Maris Piper or King Edward), peeled, boiled until very soft, and riced or mashed smoothly (no lumps - lumps create weak spots in the dough)
- 250g plain flour, sifted
- 1 tbsp unsalted butter
- ½ tsp salt
The Coating
- 2 large eggs, beaten
- 200g fine dried breadcrumbs (panko or standard)
- Sunflower oil for frying
Method
Step 1: Poach the chicken (20 minutes)
Place chicken breasts in a saucepan with the poaching liquid ingredients. Cover with cold water (approximately 600ml total) and bring to a gentle simmer. Cook for 15-18 minutes until the chicken is cooked through - no pink at the thickest point. Remove chicken and set aside to cool.
Reserve the poaching liquid. Strain it and measure - you need 500ml for the plain flour dough or 300ml for the potato dough. If you have less than needed, add water. If you have more, reduce briefly or simply use the measured amount and discard the rest. This liquid is the flavor foundation of the dough.
Step 2: Make the filling (10 minutes)
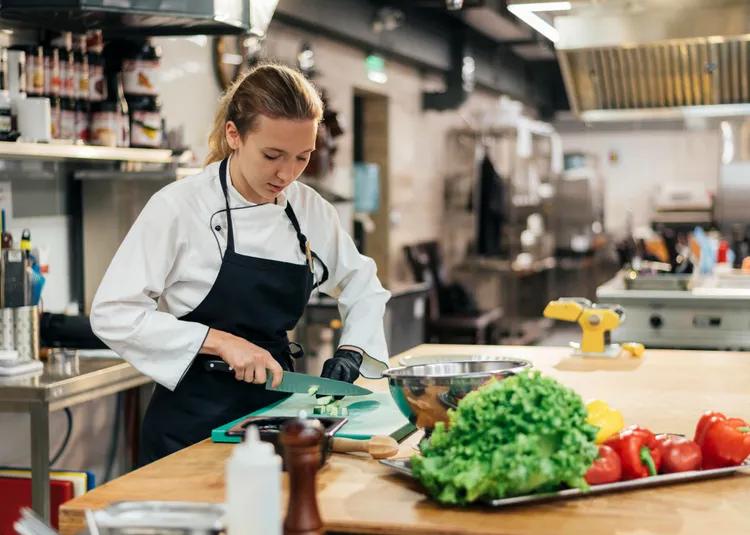
Shred the cooled chicken with two forks - work along the grain of the muscle, pulling into fine, thin strands. The shred should be fine enough that each coxinha has a smooth, even filling, not large chunks that create structural weakness.
Heat olive oil in a pan. Add onion, cook 5 minutes until soft. Add garlic, cook 1 minute. Add tomato purée and paprika, stir for 30 seconds. Add shredded chicken and stir to coat in the aromatics. Remove from heat. Allow to cool slightly, then fold in the softened cream cheese and parsley. Season generously.
The filling must be cool before it goes into the dough - warm filling softens the dough and makes shaping difficult. Refrigerate for at least 20 minutes if time allows.
Step 3: Make the dough
Plain flour version: Bring the 500ml of strained poaching liquid and the butter to a rolling boil in a large, heavy-based saucepan. Remove from heat and add the sifted flour all at once. Stir vigorously with a wooden spoon - the mixture will come together immediately into a rough, lumpy mass. Return to low-medium heat and continue stirring for 3-4 minutes, pressing and folding the dough against the sides of the pan. The dough is ready when it pulls cleanly away from the sides and base of the pan, looks smooth and uniform, and feels like a firm, slightly tacky Play-Doh. It should not stick to your hands when lightly pressed.
Potato version: Bring the 300ml of strained poaching liquid and butter to a rolling boil. Add the mashed potato and stir to combine - the mixture will look loose and strange. Add the sifted flour all at once and stir vigorously. Return to low-medium heat and cook for 2-3 minutes, stirring continuously. The potato dough comes together more quickly than the plain version. The finished dough is slightly softer and more pliable than the plain version - this is correct.
Cooling the dough: Turn the dough out onto a clean surface and allow to cool until it is comfortable to handle - approximately 10 minutes. Do not attempt to shape hot dough. Cover with a clean damp cloth while resting to prevent a skin from forming.
Step 4: Shape the coxinha
This is the step that improves dramatically with repetition. The first three or four coxinha will be imperfect - too thin in one spot, slightly uneven in their teardrop shape. By the eighth or ninth, you will have the rhythm.
Portion the dough: Divide the cooled dough into approximately 20 equal portions - about 40g each. Roll each into a smooth ball between your palms and keep covered while working.
Shape each coxinha:
- Flatten one dough ball between your palms to a disc approximately 8-9cm in diameter and 4-5mm thick. Aim for even thickness throughout - thin spots crack during frying.
- Place a heaped teaspoon of cooled filling in the centre. Do not overfill - the filling should leave at least a 2cm border of dough around it on all sides.
- Bring the edges of the disc up and around the filling, pressing the dough together at the top to seal completely. The ball should be fully enclosed with no gaps.
- Now shape into the teardrop: hold the sealed ball in both hands and gently elongate the top into a point by rolling it between two fingers. The base remains round; the top tapers to a gentle point. The finished shape should resemble a small drumstick or a teardrop standing on its wide end.
- Place on a parchment-lined tray.
The seal check: After shaping, squeeze each coxinha gently. If you can feel the filling moving toward the surface through a thin spot, re-work that area - add a small piece of extra dough and smooth it in. A compromised seal leaks filling into the oil during frying.
Step 5: Coat
Roll each coxinha in beaten egg to coat completely, then in breadcrumbs, pressing the crumbs firmly onto every surface. Ensure no bare patches remain - the breadcrumb coat is the structure that holds everything together in the hot oil.
For a thicker, more robust crust: double coat - egg → breadcrumb → egg → breadcrumb. Double-coated coxinha are more resistant to cracking and have a more satisfying crunch.
Refrigerate the coated coxinha for 20-30 minutes before frying. The chill sets the coating and significantly reduces cracking in the oil.
Step 6: Fry
Heat oil to 175-180°C in a deep, heavy-based pan. See How to Fry Like a Street Food Vendor for the complete frying guide.
Fry in batches of 3-4. Lower each coxinha gently into the oil using a spider or slotted spoon. Fry for 4-5 minutes, turning gently every 90 seconds, until deep golden brown on all sides. The dough should be cooked through and the filling should be hot - check by piercing one from the test batch with a thin skewer; it should feel hot to the touch when removed.
Drain on a wire rack (not paper towels directly - the steam from below softens the base). Salt lightly while hot.
Allow to rest for 2-3 minutes before eating. The filling is very hot.
The Freezer Strategy
Coxinha are one of the most freezer-friendly street foods in this collection. Make a large batch, freeze, and have party-ready snacks available for months.
How to freeze: After shaping and coating (but before frying), arrange on a parchment-lined tray in a single layer. Freeze until solid - approximately 2 hours. Transfer to a zip-lock bag. Frozen coxinha keep for 3 months with no quality loss.
How to fry from frozen: No thawing required. Fry at 165°C (slightly lower than fresh - the lower temperature allows the interior to heat through before the exterior darkens) for 6-8 minutes, turning regularly. The result is identical to fresh-fried.
This is the real value of the recipe: 3 hours of active work on a Sunday afternoon produces 40 coxinha in the freezer. Every party, every gathering, every "I need something impressive quickly" moment for the next three months is solved.
Serving
In Brazil, coxinha are eaten at room temperature (the padaria version - made in the morning, sold throughout the day) or hot from the fryer (the party version). Both are correct.
Hot from the fryer: The ideal - the crust is at its crispiest, the filling is molten, and the contrast between the two is at its most dramatic. Serve on paper, in quantity, at a gathering.
At room temperature: Still excellent - the dough has a satisfying chew at room temperature that it doesn't have when hot. This is how most Brazilians encounter coxinha on a daily basis.
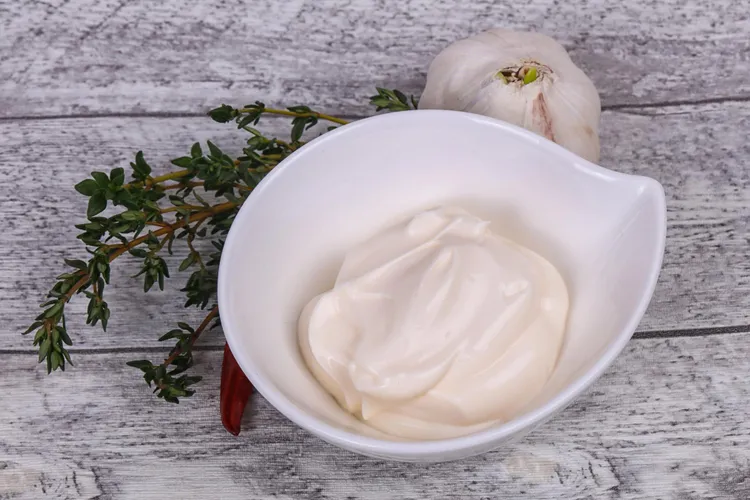
Dipping sauce: Coxinha is traditionally eaten without a dipping sauce in Brazil. A small pot of hot sauce (pimenta vermelha - Brazilian red chili sauce) is sometimes offered alongside. Ketchup is common at children's parties. For a home gathering, a small bowl of the aji amarillo sauce or a simple hot sauce works very well.
The Vegan Version: Jackfruit Coxinha
Jackfruit has become the default vegan substitute for shredded chicken in Brazilian cooking - and in coxinha specifically, it works so well that even non-vegan Brazilians order it. The texture of young green jackfruit, shredded and seasoned, is remarkably similar to shredded chicken: fibrous, slightly chewy, absorbing the surrounding flavors completely.
Jackfruit Filling
- 400g young green jackfruit (canned in brine or water, not syrup - drain thoroughly)
- 150g vegan cream cheese (Violife or similar)
- 1 small white onion, very finely diced
- 3 cloves garlic, minced
- 2 tbsp olive oil
- 1 tbsp tomato purée
- 1 tsp sweet paprika
- 1 tsp smoked paprika
- Salt and pepper to taste
- Large handful fresh parsley, chopped
Method: Drain and rinse the jackfruit thoroughly. With your hands or two forks, shred each piece along its natural fibers - it should shred into long, thin strands that closely resemble pulled chicken. Sauté onion and garlic in olive oil for 5 minutes. Add tomato purée and both paprikas, stir for 30 seconds. Add shredded jackfruit, stir to coat, and cook for 5 minutes until the jackfruit has absorbed the aromatics and any excess moisture has evaporated. Cool, then fold in vegan cream cheese and parsley.
The dough for vegan coxinha: Replace chicken poaching liquid with vegetable stock. Replace butter with vegan butter or olive oil. Everything else is identical.
Variations
Coxinha de Catupiry (Classic São Paulo)
Replace cream cheese with Catupiry - Brazil's iconic soft processed cheese, available at Brazilian grocery stores and online. Catupiry has a richer, slightly tangier character than cream cheese and is the filling of choice at the best coxinha padarias in São Paulo. If you can find it, use it.
Coxinha com Queijo e Presunto (Cheese and Ham)
Replace the chicken filling with a mixture of finely diced cooked ham and shredded mozzarella. The mozzarella melts inside the coxinha during frying, producing a cheese pull when bitten. A simpler filling that requires no cooking and is excellent for large batches.
Mini Coxinha (Party Size)
Make 20g portions instead of 40g. The mini version is two bites, cooks in 3 minutes, and is the format for parties - serve 5-6 per person on a platter, hot from the fryer. The smaller size means more surface area to filling ratio - more crust per bite, which some people prefer.
Coxinha de Camarão (Prawn)
Replace the chicken with finely chopped cooked prawns, sautéed briefly in garlic, olive oil, and a squeeze of lemon. The prawn filling is lighter and more delicate than chicken - add extra cream cheese to maintain the creaminess. A particularly popular variation in coastal Brazilian cities.
Troubleshooting
The dough is cracking when shaped. Either the dough is too dry (add 1 tbsp of warm poaching liquid and knead to incorporate) or it has been allowed to cool too much and has dried out. Keep the resting dough covered with a damp cloth at all times. Re-warm slightly if it has become too stiff.
The coxinha is leaking filling into the oil. The seal was insufficient - there was a gap or thin spot in the dough that the filling found during the thermal expansion of frying. Check every coxinha for thin spots before coating. Re-work any weak areas with extra dough pressed into the surface.
The coating is falling off during frying. The coating wasn't pressed firmly enough, or the coated coxinha weren't chilled before frying. Press the breadcrumbs actively onto every surface and refrigerate for 20-30 minutes before the oil.
The dough is gummy and dense inside after frying. The oil temperature was too low - the interior didn't reach the temperature needed to cook through. Ensure the oil is at 175°C before adding coxinha. A thermometer is essential for this recipe.
Pro Tips
- The poaching liquid is the flavor of the dough. Season it generously before poaching the chicken - the resulting liquid becomes the dough's liquid base, and a bland poaching liquid produces a bland dough. Taste the liquid before making the dough and adjust if needed.
- Cool the filling completely before assembly. Warm filling softens the dough and makes the shaping difficult and the dough prone to tearing. If time is short, spread the filling on a cold tray and refrigerate for 15 minutes.
- Keep the dough covered. A skin forms on exposed dough within minutes - this skin creates weak spots that crack during shaping and frying. Keep covered with a damp cloth whenever not actively working with it.
- Make a test coxinha. Before frying the entire batch, fry one coxinha from the batch. Check the color timing, the internal temperature, and that the filling is hot all the way through. Adjust oil temperature if needed before committing the rest.
- Embrace imperfect shapes. The classic teardrop takes practice. Imperfect shapes taste identical to perfect ones. The filling, the dough, and the frying are what matter - the shape is presentation.
Common Mistake: Overfilling The temptation is to add more filling for more flavor. The result is a coxinha that cannot be sealed - the dough is stretched too thin over the filling, creating weak spots that crack open in the oil, spilling the filling into the fat and leaving you with a broken, greasy shell. A heaped teaspoon of filling per coxinha is the correct amount. It seems conservative when shaping. It is exactly right when eating.
FAQ
Q: Can I bake coxinha instead of frying?
Yes - brush with oil and bake at 200°C for 25-30 minutes, turning halfway. The result is noticeably different: paler, less crispy, slightly drier. Baked coxinha are an acceptable lighter option but are genuinely inferior to the fried version. If frying anxiety is the concern, the frying guide removes all uncertainty about the process.
Q: What is Catupiry and where do I find it?
Catupiry is a Brazilian soft processed cheese - creamy, mildly tangy, with a spreadable consistency similar to a soft cream cheese but richer. It is a specific brand (founded in 1911) that has become a generic term for this type of cheese in Brazil. Available at Brazilian grocery stores and online. Full-fat cream cheese is the closest readily available substitute and is excellent.
Q: Can I use rotisserie chicken instead of poaching?
Yes - rotisserie chicken shredded finely works very well for the filling. The trade-off: you won't have the seasoned poaching liquid for the dough. Substitute with good-quality chicken stock (shop-bought is fine) for the dough liquid. The overall result is slightly less cohesive in flavor - the poaching liquid version has a better integration between dough and filling - but it saves 20 minutes.
Q: How do I know when the dough is properly cooked?
The dough is ready when it pulls cleanly away from the sides and base of the pan, holds its shape when a spoon is pressed into it and released, looks smooth and glossy rather than lumpy, and doesn't stick aggressively to a lightly floured hand when pressed. If the dough still looks wet and sticky after 5 minutes of cooking, continue - it needs to dry out slightly over the heat.
Q: Can coxinha be reheated?
Yes - oven is the best method: 180°C for 8-10 minutes on a wire rack to restore crunch. Alternatively, an air fryer at 180°C for 5 minutes produces excellent results. Microwave reheating makes the crust soft and the dough gummy - avoid.
🔗 Continue Exploring
- How to Fry Like a Street Food Vendor: The Complete Home Guide
- The Perfect Arancini: Sicily's Greatest Street Food at Home
- Peruvian Anticuchos: The Street Food Secret of Lima
- Mexican Street Tacos: The Only Taco Guide You'll Ever Need
- The Street Food Sauce Bible: 15 Sauces from 15 Countries
- 10 Street Food Dishes You Can Make in 30 Minutes or Less
- Global Street Food at Home: The Ultimate Guide
Latest