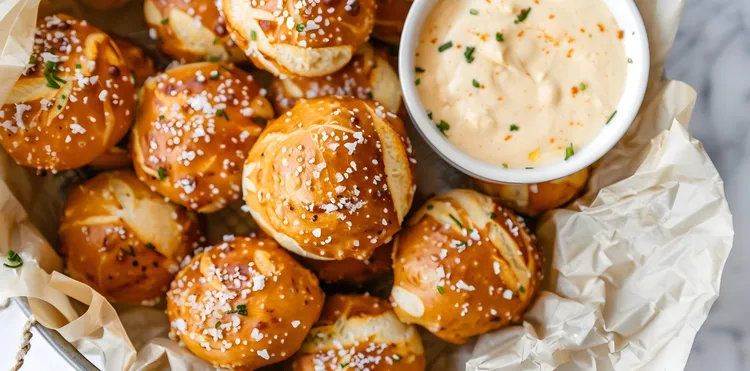
Mini sea salt and herb dampers
Mini sea salt and herb dampers are a simple yet flavorful variation of traditional Australian bush bread. Infused with fresh rosemary and thyme, these small loaves are perfect for snacking or as a side dish.
Cook time 20 min
Prep time 10 min
Ingredients:
3 cups self-raising flour2 tbsp rosemary
2 tbsp fresh thyme
Mini sea salt and herb dampers are a delightful twist on traditional Australian bush bread. The addition of fresh herbs such as rosemary and thyme brings an aromatic depth to these small, easy-to-make loaves. Perfect for a savory snack or as an accompaniment to your favorite meals, these mini dampers are sure to impress.
Instructions:
Preheat your oven to 200°C (390°F). Line a baking tray with parchment paper or lightly grease it with olive oil.
In a large mixing bowl, combine the self-raising flour, chopped rosemary, chopped thyme, and 1 teaspoon of sea salt. Mix well to evenly distribute the herbs throughout the flour.
Make a well in the center of the flour mixture. Pour in the cold water and olive oil.
Using a wooden spoon or your hands, gently mix the ingredients together until they form a dough. The dough should be slightly sticky but workable.
Transfer the dough onto a lightly floured surface. Knead it gently for 1-2 minutes until it becomes smooth and all ingredients are well incorporated.
Divide the dough into 8-10 equal portions, depending on the size you prefer for your mini dampers. Roll each portion into a ball and place them onto the prepared baking tray.
Slightly flatten each dough ball with your hand. Sprinkle a pinch of sea salt on top of each flattened damper for an extra burst of flavor.
Place the baking tray in the preheated oven and bake for 20-25 minutes, or until the dampers are golden brown and sound hollow when tapped on the bottom.
Remove the dampers from the oven and allow them to cool slightly on a wire rack. Serve warm with butter, or your favorite dipping sauce.
These mini sea salt and herb dampers are not only simple to make but also incredibly versatile. Their herby flavor and soft texture make them an excellent addition to any meal or a tasty snack on their own. With a few easy-to-follow steps and some helpful tips, you'll have delicious mini dampers ready to enjoy in no time!
Mini sea salt and herb dampers FAQ:
Bake the mini dampers in a preheated oven at 200°C (390°F) for 20-25 minutes, or until they turn golden brown and sound hollow when tapped on the bottom.
Yes, you can substitute fresh rosemary and thyme with dried herbs. Use about one-third of the amount (approximately 1 teaspoon of each) since dried herbs are more concentrated in flavor.
Store leftover mini dampers in an airtight container at room temperature for up to 2 days. For longer storage, you can freeze them for up to 3 months; just ensure they are well-wrapped.
Use a standard baking tray lined with parchment paper or lightly greased. There’s no specific size limitation, but ensure the dampers have enough space to expand while baking.
The dampers are done when they are golden brown and sound hollow when tapped on the bottom. Additionally, a toothpick inserted in the center should come out clean.
Cooking Tips:
- Ensure your self-raising flour is fresh and not past its use-by date for optimal rising.
- Finely chop the rosemary and thyme to release their full flavor and ensure they're evenly distributed throughout the dough.
- Preheat your oven properly to ensure even baking and a nice golden crust.
- Do not overmix the dough; mix just until the ingredients come together to avoid tough dampers.
- Consider brushing the tops with a little olive oil or melted butter before baking to enhance the color and flavor.
- Experiment with adding other herbs or spices based on your taste preferences.
- Serve warm with a pat of butter or a drizzle of olive oil for an extra touch of indulgence.
Nutrition Facts
6 ServingsCalories 280kcal
Protein 9g
Carbohydrates 54g
Fiber 2.95g
Sugar 0.20g
Fat 1.28g
More recipes
Flourless orange cake
A moist flourless orange cake made with whole oranges and almonds.
21 Apr 2026Strawberry and lime tray pavlova
A refreshing tray pavlova topped with strawberries and lime.
21 Apr 2026Macadamia and ginger anzac biscuits
Delicious Macadamia and Ginger ANZAC Biscuits, perfect for sharing.
21 Apr 2026Salmon mornay with potato and cauliflower mash
Creamy Salmon Mornay served with potato and cauliflower mash.
21 Apr 2026