Vegan Mac and Cheese: The Version Worth Making
Four layers of savoury depth. A golden breadcrumb crust. The mac and cheese that delivers on the promise.

The most searched vegan recipe in the world has a reputation problem. Ask anyone who has made vegan mac and cheese - at least once, probably more - and they will describe the same experience: a sauce that looked right coming out of the blender, that smelled right going into the baking dish, and that tasted of very little once it hit the pasta. Creamy, yes. Rich, yes. But flat. Missing the specific savoury depth that makes mac and cheese the comfort food it is.
The flatness has a cause, and the cause is not cashews. Cashew cream is an excellent base for a cheese sauce - neutral, rich, the right body. The problem is that cashew cream alone is not a cheese sauce. It is cream. Cheese has depth that cream doesn't have: the lactic tang of fermentation, the glutamate savouriness of aged protein, the specific sharpness that comes from months or years of development. Replicating that depth requires not one ingredient but four, working together.
This recipe uses four savoury depth-builders alongside the cashew cream base: nutritional yeast (glutamate savouriness), white miso (fermented depth), roasted garlic (sweetness and complexity), and dijon mustard (sharpness and brightness). Each adds a different dimension. Together, they build a sauce that tastes layered and complex - that tastes, in the specific way that matters, of cheese.
The Four-Layer Cheese Flavour System
Understanding what each element does makes the sauce intuitive to adjust:
Nutritional yeast provides the primary cheese-like savouriness - the glutamate depth that distinguishes cheese sauce from cream sauce. Use a full 5 tbsp. This is not the moment for restraint.
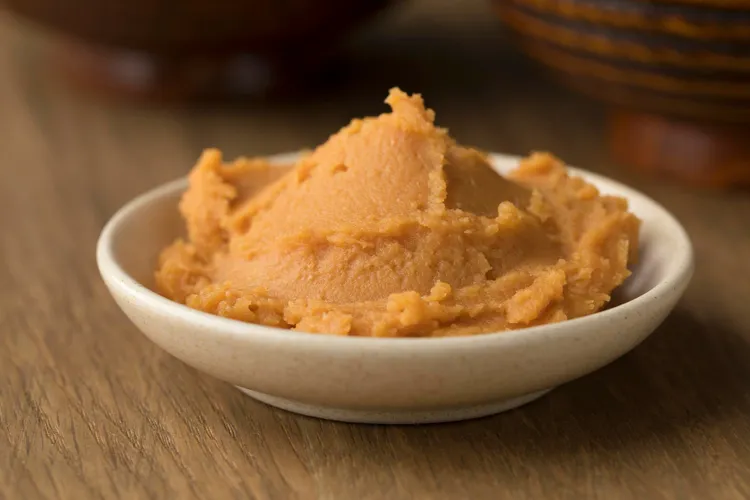
White miso provides fermented depth - the rounding, savoury complexity that aged cheese gets from its own fermentation. One tablespoon is enough; more and the miso flavour becomes identifiable (which is not what we want here - it should be present but invisible).
Roasted garlic provides sweetness and complexity. Raw garlic produces a sharp, pungent note that is wrong for this sauce. Roasted garlic - the same cloves baked until caramelised and sweet - produces a gentle, rounded flavour that adds depth without aggression. It is worth the 45 minutes.
Dijon mustard provides sharpness and brightness. Mustard's sharp, slightly pungent quality mimics the sharpness of aged cheddar - the quality that makes good cheese sauce linger pleasantly on the palate rather than fading immediately.
Lemon juice provides acidity - the clean, bright note that lifts the richness of the cashew cream and prevents the sauce from feeling heavy. Cheese has its own acidity from lactic fermentation; lemon juice provides this externally.
Ingredients
Serves 4-6 | Active time: 20 minutes | Total time: 1 hour 15 minutes (including roasting garlic)
The Cashew Cheese Sauce
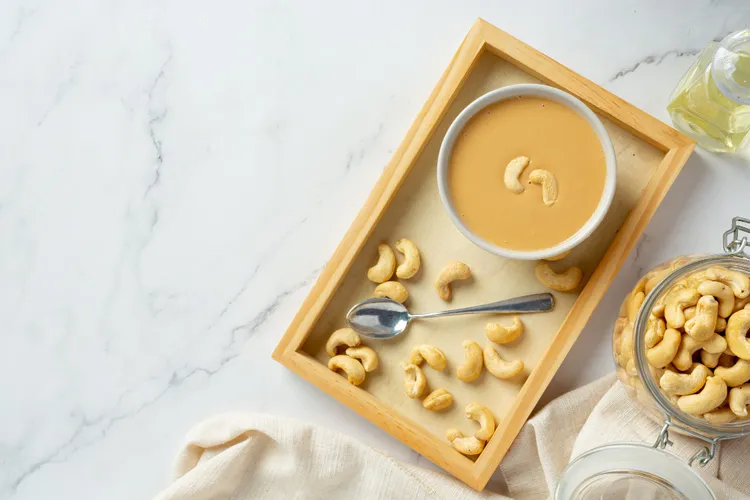
- 200g raw cashews, soaked overnight (or quick-soaked in boiling water for 20 minutes) - see How to Make Cashew Cream
- 1 whole head of garlic, roasted (see below)
- 5 tbsp nutritional yeast - measure generously
- 1 tbsp white miso
- 1 tsp dijon mustard
- Juice of 1 lemon (approximately 4 tbsp)
- 1 tsp smoked paprika - adds colour and a gentle background warmth
- ½ tsp garlic powder - in addition to the roasted garlic; provides a sharper garlic note alongside the sweet roasted
- ½ tsp onion powder
- ¼ tsp ground turmeric - primarily for colour (vivid yellow, cheese-like)
- 200ml unsweetened plant milk (oat milk or soy milk - both work; avoid coconut milk which adds sweetness)
- Salt - approximately 1½ tsp, adjusted to taste
- White pepper to taste
The Pasta
- 400g dried pasta - elbow macaroni is traditional and ideal (the tubular shape traps sauce inside); shells, rigatoni, or cavatappi also work excellently
- Salt for the pasta water
The Breadcrumb Topping (For Baked Version)
- 80g panko breadcrumbs (panko produces a lighter, crispier topping than regular breadcrumbs)
- 2 tbsp olive oil
- 2 tbsp nutritional yeast
- ½ tsp smoked paprika
- Salt and pepper
Method
Step 1: Roast the garlic (45 minutes - do this first)
Preheat the oven to 200°C (fan). Slice the top third off the head of garlic to expose the cloves. Drizzle with olive oil, wrap tightly in foil, and roast for 40-45 minutes until the cloves are deeply golden and completely soft - they should collapse when pressed and smell intensely sweet and caramelised.
Allow to cool enough to handle, then squeeze the cloves directly into the blender. Discard the papery skin.
Can this step be skipped? Yes - replace the roasted garlic with 1 tsp of garlic powder (in addition to the ½ tsp already in the recipe). The sauce will be good but slightly less complex; the sweetness and depth that roasted garlic provides is genuinely useful here.
Make ahead: Roasted garlic keeps refrigerated for a week. Roast a batch at the weekend and use throughout the week.
Step 2: Soak and prepare the cashews
If not already done: soak 200g of raw cashews in cold water for at least 4 hours (overnight is better). Drain and rinse well.
For the quick-soak: cover cashews with boiling water, soak 20-25 minutes until soft, drain and rinse.
Step 3: Cook the pasta
Bring a large pot of generously salted water to a rolling boil. Cook the pasta until 2 minutes before the packet suggests - it will continue cooking in the sauce. Drain, reserving 250ml of pasta cooking water - this starchy water is the most important consistency-adjustment tool in the recipe.
Step 4: Make the cheese sauce
Combine all sauce ingredients in a blender: soaked cashews, roasted garlic cloves, nutritional yeast, white miso, dijon mustard, lemon juice, smoked paprika, garlic powder, onion powder, turmeric, plant milk, salt, and white pepper.
Blend on high speed for 2-3 full minutes until completely smooth - stop and scrape down the sides as needed. The sauce should be thick, vivid golden-yellow, and completely smooth with no graininess.
Taste at this stage. The raw sauce should taste notably cheesy, slightly sharp, deeply savoury, and well-seasoned. Adjust:
- Too flat: more nutritional yeast and a pinch more salt
- Not sharp enough: more lemon juice
- Needs more depth: a little more miso (start with ½ tsp extra)
- Too thick: add a splash more plant milk
Step 5 (Option A): Stovetop Version (25 minutes total)
Transfer the blended sauce to a large saucepan over medium heat. Warm, stirring constantly, until the sauce is hot and beginning to bubble gently. It will thicken significantly as it heats - add pasta cooking water a splash at a time, stirring, until the sauce is the consistency of a thick, pourable cream sauce.
Add the drained pasta and toss to coat completely. Continue stirring over medium heat for 2 minutes until the sauce clings to every piece of pasta. If it thickens further, add more pasta water.
Taste and adjust seasoning. Serve immediately.
Step 5 (Option B): Baked Version (25 minutes additional)
Preheat the oven to 190°C (fan) if not already on.
Make the breadcrumb topping: toss panko breadcrumbs with olive oil, nutritional yeast, smoked paprika, salt, and pepper until evenly coated.
Thin the cheese sauce slightly with pasta cooking water - it should be pourable (the oven will thicken it further during baking). Combine the sauce and pasta in a large ovenproof dish or cast iron skillet, tossing to coat completely. The pasta should be generously coated - the sauce will absorb during baking.
Scatter the breadcrumb mixture evenly over the top.
Bake for 20-25 minutes until the sauce is bubbling at the edges and the breadcrumbs are deeply golden. Rest for 5 minutes before serving - the sauce continues to set slightly and the breadcrumbs crisp further.
The superior result: The baked version is significantly better than the stovetop version for the first serving. The heat of the oven concentrates the sauce's flavour, the pasta absorbs the sauce more deeply, and the contrast between the golden, crispy breadcrumb topping and the creamy interior below is one of the great textural combinations in comfort food. The stovetop version is faster and better for reheating leftovers.
Variations
White Truffle Mac and Cheese
Add 1 tsp of truffle oil and 1 tbsp of finely chopped fresh truffle (or truffle paste from a jar) to the blended sauce before combining with pasta. The truffle's earthy, aromatic intensity amplifies the cheese sauce's depth into something genuinely special. Omit the smoked paprika - it conflicts with the truffle.
Jalapeño and Smoked Paprika (The Spicy Version)
Add 2 tbsp of pickled jalapeño brine and 2 finely diced pickled jalapeños to the cheese sauce. Increase the smoked paprika to 1.5 tsp. The jalapeño heat and brine add a sharpness that is excellent against the richness of the cashew cream. Top with additional pickled jalapeños and a scattering of crispy fried onions.
Green Mac and Cheese (Hidden Vegetable)
Add 200g of frozen peas (defrosted) and 100g of baby spinach to the blender with the sauce ingredients. The sauce turns a vivid green - striking and slightly unusual, but the sweetness of the peas integrates beautifully with the savoury cheese flavour. Excellent for children who are suspicious of visible vegetables.
Lobster-Style Mac (With Breadcrumbs and Lemon)
Top the baked mac and cheese with: 200g of cooked large king oyster mushrooms (sliced, seared in butter until golden - they have a seafood-like texture when properly caramelised), additional lemon zest, fresh chives, and a sprinkle of nori flakes (for an oceanic note). The "lobster mac" aesthetic without any seafood.
Reheating
Mac and cheese thickens significantly as it cools - the cashew cream sets and the pasta continues to absorb the sauce. Reheating requires patience:
Stovetop: Add 2-3 tbsp of plant milk or water to the portion. Heat over low heat, stirring constantly, until loosened and hot. Do not rush with high heat - the sauce can split.
Oven: Cover the dish with foil, add 3 tbsp of water drizzled over the top, and reheat at 160°C for 15-20 minutes. Remove the foil for the final 5 minutes to re-crisp the topping.
Microwave: Works adequately - add a splash of water, cover, and heat in 1-minute increments, stirring between each.
Make-Ahead Notes
The sauce: Can be made up to 3 days ahead and refrigerated. It will thicken in the fridge - thin with plant milk before using and re-blend briefly if it has separated.
The assembled dish (unbaked): Assemble with the breadcrumb topping and refrigerate for up to 24 hours before baking. Add 5-8 minutes to the baking time from cold.
Freezing: Freeze the sauce (without pasta) in portions for up to 3 months. Thaw overnight in the fridge, thin with plant milk, and combine with freshly cooked pasta.
Pro Tips
- Reserve pasta water generously. The starchy pasta cooking water is the primary consistency-adjustment tool in this recipe. It thins the sauce while adding body (the dissolved starch helps the sauce cling to the pasta). Plain water or plant milk also work but produce a slightly thinner, less cohesive result.
- Taste the sauce from the blender, not the pot. The sauce flavour from the blender is the clearest representation of what it will taste like finished. Adjust seasoning at this stage rather than after combining with pasta, when it is harder to assess accurately.
- The turmeric is for colour. It contributes essentially no flavour at the quantity used (¼ tsp in a large batch of sauce). Its purpose is the vivid golden-yellow that makes the sauce look unmistakably like cheese sauce. Do not omit it - the visual cue is part of the experience.
- Panko over regular breadcrumbs. Panko breadcrumbs have a coarser, lighter texture that toasts to a crispier result than regular breadcrumbs. If only regular breadcrumbs are available, dry them in the oven at 150°C for 10 minutes before using - this removes moisture and improves crispiness.
Common Mistake: Not Blending Long Enough Cashew cream requires a minimum of 2 full minutes of high-speed blending to reach complete smoothness. Many cooks stop blending at 45 seconds when the sauce looks smooth - but residual graininess from the cashew solids remains and produces a slightly gritty sauce rather than the silky, restaurant-quality result the recipe produces when blended fully. Set a timer: 2 minutes minimum, scraping down halfway. With a high-powered blender this is less critical; with a standard blender, it is non-negotiable.
FAQ
Q: Can I make this gluten-free?
Yes - use a certified gluten-free pasta and replace the panko breadcrumbs with gluten-free breadcrumbs or crushed gluten-free crackers. Ensure the nutritional yeast is labeled gluten-free (most are; some are produced in facilities that also process wheat). White miso is generally gluten-free but check the label.
Q: My sauce is grainy. What went wrong?
Almost certainly insufficient blending or insufficient soaking. If the sauce is already combined with pasta: transfer everything back to the blender and blend on high for 2 minutes - the heat from the pasta helps re-emulsify. Strain through a fine-mesh sieve as a last resort. Prevention: proper overnight soaking and minimum 2-minute blending.
Q: Can I use store-bought vegan cheese instead?
Yes - many good vegan cheese brands (Violife, Sheese, Miyoko's) produce cheddar-style shreds that melt reasonably well. The sauce will be different - often less complex and more aggressively "cheesy" in a way that can taste artificial. The cashew cream version produces a more nuanced result. Combining both (cashew cream base + 80g vegan cheddar shreds melted in) produces a version that is both richer and more complex than either alone.
Q: How much nutritional yeast is too much?
In this recipe, 5 tbsp is the calibrated amount for 4-6 servings. More than 6 tbsp and the nutritional yeast flavour can become identifiable as yeasty rather than cheesy - the flavour crosses a threshold where it tastes of the ingredient rather than the dish. If you find nutritional yeast particularly strong, start with 3 tbsp and increase to taste.
🔗 Continue Cooking
Latest