Chocolate Brownies: The Definitive Fudgy Recipe
The variables that determine whether a brownie is fudgy or cakey - and the specific recipe that gets the fudgy version exactly right
Brownies sit at a specific intersection that almost no other baked good occupies: they are between cake and chocolate confectionery. A cakey brownie is not bad. It is just a piece of chocolate cake in a square tin - pleasant, soft, not especially interesting. A genuinely fudgy brownie is something different: dense, rich, barely set, with a surface that has a thin, crinkled, slightly shiny crust and an interior that yields to the tooth in a way that is more ganache than cake. It is the difference between a good bake and a memorable one.
The reason most brownie recipes produce something between these two extremes - agreeable but not remarkable - is that the variables that determine brownie texture are specific and require specific treatment. This post explains them clearly, because once you understand them, you will never make an accidental brownie texture again.
The Brownie Variables: What Makes Them Fudgy
Brownie texture sits on a spectrum from fully cakey to fully fudgy, and every recipe is a calibration of five variables. Here is what each one does:
Flour: The most direct fudgy/cakey dial. More flour = more structure = cakier. Less flour = less structure = fudgier. A cakey brownie uses approximately 150g of flour per 200g of chocolate; a fudgy brownie uses 60-80g. This recipe uses 75g. At this ratio, the brownie is held together more by the set chocolate and eggs than by the gluten structure of the flour - which is precisely what produces the dense, yielding interior.
Fat: Both the type and the quantity matter. Butter produces more flavour than oil (Maillard-active milk solids); oil produces more moisture than butter (it doesn't evaporate during baking). The combination of both - used in this recipe - produces the best of each: the flavour of butter, the moistness of oil. More fat in general = fudgier. The chocolate is itself a significant source of cocoa butter (fat).
Sugar: More sugar = fudgier (sugar is hygroscopic - it absorbs and retains water, keeping the interior moist). This recipe uses more sugar than a cakey brownie would. The ratio of brown to white sugar also matters: brown sugar's molasses content adds flavour depth and extra moisture.
Eggs: More eggs = more protein = more structure = cakier. Fewer eggs = less structure = fudgier. But eggs also provide the emulsification and richness that makes brownies taste like brownies rather than chocolate cake. This recipe uses a specific ratio: 3 whole eggs for a batch that provides enough richness without over-structuring.
Baking time: The most immediately adjustable variable. Brownies baked until a skewer comes out clean are cakey. Brownies baked until a skewer comes out with wet, shiny crumbs are fudgy. Brownies baked until a skewer comes out with a few moist crumbs are in the correct middle ground for this recipe - set at the edges, barely set at the centre, fudgy throughout once cooled. Take them out earlier than instinct says.
The position on the spectrum this recipe targets: Fully fudgy without being underbaked - dense, barely set, with a crinkled shiny crust and an interior that holds its shape when cut but yields completely when eaten.
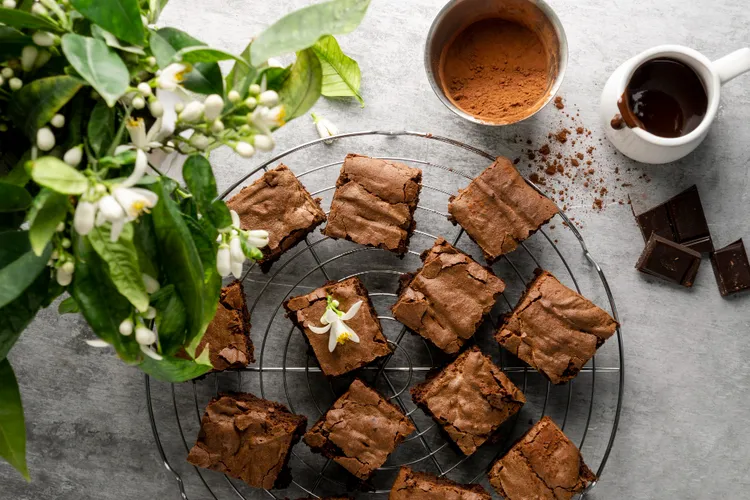
The Crinkled Crust: The Sign of a Great Brownie
The thin, crinkled, slightly shiny crust on a properly made brownie is not a happy accident. It is the result of dissolved sugar migrating to the surface during baking and crystallising into a thin, glossy layer as the brownies cool.
Two techniques encourage it:
Vigorous whisking of the eggs and sugar before adding the other ingredients - this dissolves the sugar into the eggs and creates a foam that rises to the surface during baking, producing the characteristic crinkle as it sets.
Using a combination of melted chocolate and cocoa powder - the cocoa solids in the chocolate contribute to the surface formation.
Skipping the egg-sugar whisking step (adding everything to the pan at once) produces perfectly good brownies but with a matte, plain surface rather than the crinkled crust. The whisking step takes 90 seconds and is worth it.
Ingredients
Makes 16 brownies | Active time: 15 minutes | Total time: 50 minutes
- 200g dark chocolate (70% cocoa solids minimum) - the primary chocolate; higher cocoa percentage = more intense flavour, slightly drier result; 70% is the right balance
- 120g unsalted butter, cubed
- 30ml neutral oil (sunflower or vegetable) - the moisture insurance
- 250g caster sugar (or a mix: 200g caster + 50g soft light brown for added depth)
- 3 large eggs, at room temperature
- 1 tsp vanilla extract
- 75g plain flour - the deliberately low amount that produces the fudgy texture
- 30g good-quality cocoa powder - the second chocolate element; use Dutch-process cocoa for a deeper colour and less bitter flavour
- ½ tsp fine sea salt - essential
- Optional: 100g chocolate chips - for additional chocolate pockets inside the brownie
For a 20cm square tin - this is the correct size for this quantity. A larger tin produces thinner brownies that cook faster (adjust timing accordingly); a smaller tin produces thicker brownies that take longer to set.
Method
Step 1: Melt the chocolate and butter (5 minutes)
Combine the dark chocolate, butter, and neutral oil in a heatproof bowl. Melt over a pan of barely simmering water (bain-marie), stirring occasionally. Do not let the bowl touch the water.
Alternatively: microwave in 30-second bursts, stirring between each, until melted and smooth.
Remove from heat and allow to cool for 5-10 minutes until warm but not hot. Hot chocolate added to eggs produces scrambled eggs.
Why melt rather than cream? Unlike a cake where creamed butter incorporates air for leavening, brownies deliberately use melted fat - the absence of incorporated air is part of what makes them dense and fudgy.
Step 2: Whisk eggs and sugar (2 minutes)
In a large bowl, whisk the sugar and eggs together vigorously for 90 seconds until the mixture is pale, slightly increased in volume, and falls in thick ribbons from the whisk. This step dissolves the sugar into the eggs and creates the foam that produces the crinkled crust.
Add the vanilla extract. Whisk briefly to combine.
Step 3: Combine chocolate and egg mixture (1 minute)
Pour the cooled melted chocolate mixture into the egg-sugar mixture in a steady stream, folding gently with a spatula. The mixture should become thick, glossy, and homogeneous.
Step 4: Fold in the dry ingredients (1 minute)
Sift the flour, cocoa powder, and salt directly over the chocolate mixture. Fold with a spatula using approximately 15-20 folds - until just combined with no visible streaks of flour. Add the chocolate chips (if using) and fold in with 2-3 additional strokes.
The minimal mixing principle applies here as in banana bread: every fold after the flour is incorporated develops gluten. Brownies need almost no gluten - fold until just combined and stop.
Step 5: Bake (22-25 minutes)
Preheat the oven to 180°C (fan). Line a 20cm square tin with parchment, leaving an overhang on two sides for easy removal.
Pour the batter into the prepared tin and spread to the corners. The batter will be thick.
Bake for 22-25 minutes. Check at 22 minutes:
The skewer test for fudgy brownies: Insert a skewer into the centre. It should come out with wet, shiny batter clinging to it - not clean. This seems underbaked. It is the correct doneness. The brownies will continue to set as they cool.
The visual test: The edges will be set and pulling away from the tin; the centre will look slightly underdone and wobbly when the tin is gently shaken. The surface should have the characteristic crinkled, slightly shiny appearance.
If the skewer comes out clean and dry: the brownies are cakey. They are still good, but not what this recipe is aiming for. Note the time for next batch and remove 3-4 minutes earlier.
Step 6: Cool (critical)
Allow to cool completely in the tin - a minimum of 2 hours, ideally longer. The fudgy interior sets as it cools. Warm fudgy brownies are delicious but impossible to cut cleanly. Completely cooled brownies can be cut into 16 pieces with a sharp knife wiped between each cut.
For the cleanest cuts: Refrigerate for 1 hour after cooling to room temperature. The cold firms the structure. Remove from the fridge 20 minutes before eating - cold brownies lose some of their flavour intensity.
Four Variations
Salted Caramel Swirl
Make a simple caramel: heat 100g of caster sugar in a dry saucepan until amber. Add 60ml of double cream (stand back - it will spit). Add 30g of butter and 1 tsp of flaky salt. Stir until smooth. Cool to room temperature.
Pour the brownie batter into the tin. Drop spoonfuls of the cooled caramel over the surface. Use a skewer to swirl. The caramel sinks slightly during baking, creating pockets of soft, salty caramel throughout the brownie.
Tahini Marble
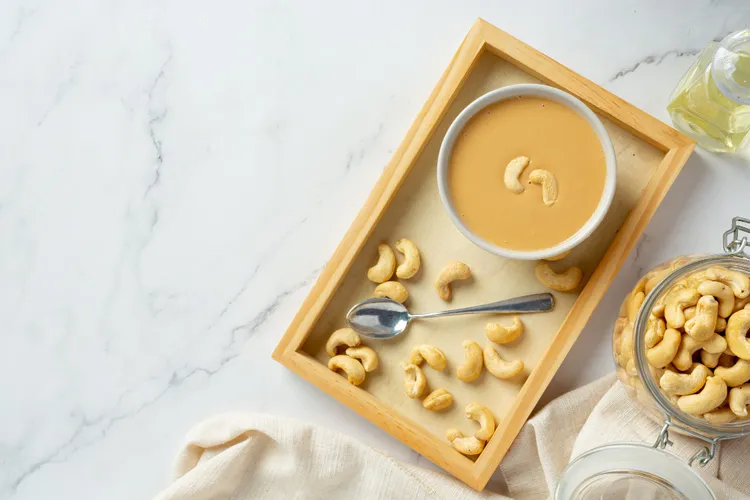
Thin 4 tbsp of good-quality tahini with 1 tbsp of maple syrup until pourable. Drop over the brownie batter in spoonfuls and swirl with a skewer. The tahini's nuttiness and slight bitterness is the perfect counter to the brownie's sweetness. Connects to the Tahini post in the World Cuisines collection.
Miso Caramel
Add 1 tbsp of white miso to the caramel variation above, whisking it in with the butter. The miso adds a fermented, deeply savoury note to the caramel that makes the combination more complex than plain salted caramel. Connects to the Miso post. This is the brownie that most consistently produces the question "what is in this?"
Espresso and Dark Chocolate
Add 2 tsp of instant espresso powder to the melted chocolate mixture. Coffee amplifies chocolate flavour - it does not add a coffee flavour in the quantities used, but it deepens and intensifies the chocolate. Use alongside an additional 50g of chocolate chips for maximum effect.
Make-Ahead and Storage
Room temperature: Brownies keep in an airtight container for 4-5 days, improving on days 2 and 3 as the flavour develops. Do not refrigerate at room temperature - the cold firms them unpleasantly.
Refrigerator: For the cleanest-cut, most structurally firm version: store refrigerated in an airtight container for up to 1 week. Remove 20 minutes before eating.
Freezer: Brownies freeze exceptionally well - individually wrapped in cling film, then in a sealed bag, for up to 3 months. Thaw at room temperature for 1-2 hours. The fudgy texture survives freezing better than any other bake.
The day-after improvement: Like most intensely chocolate-flavoured baked goods, brownies improve significantly after 24 hours at room temperature. The chocolate flavour deepens and integrates; the texture settles and firms slightly. Make them the day before you need them.
Pro Tips
- Use good chocolate. The brownie is fundamentally a vehicle for chocolate flavour, and the quality of the chocolate determines the quality of the brownie. A 70-75% dark chocolate from a good brand (Valrhona, Callebaut, Green & Black's, Lindt 70%) produces a significantly better result than cooking chocolate. Buy a bar you would eat.
- Don't overbake. The single most common brownie failure is overbaking - removing them when the skewer comes out clean rather than with wet crumbs. Trust the skewer-with-crumbs result, let them cool completely, and they will be fudgy.
- The tin size determines the thickness and timing. A smaller tin (18cm) produces thicker brownies that need 5 more minutes; a larger tin (23cm) produces thinner brownies that need 5 fewer minutes. Adjust accordingly.
- Wipe the knife between cuts. A clean knife cut from the top and immediately withdrawn produces a clean brownie edge. A knife dragged through the brownie smears the fudgy interior. Use a sharp knife, wipe between each cut, and cut from above rather than sawing.
Common Mistake: Baking Until the Skewer Comes Out Clean A clean skewer means cakey brownies. For fudgy brownies, the skewer should come out with wet, shiny batter on it when you test at the 22-minute mark. They look underbaked. They are not. As they cool over 2 hours, the chocolate and eggs set and the interior firms from liquid to fudgy. Every minute of additional baking after the "wet skewer" stage moves the brownie further along the cakey spectrum. Know what you want and pull them at the right moment.
FAQ
Q: Can I use milk chocolate instead of dark?
Yes - but reduce the added sugar by 30% (milk chocolate is significantly sweeter) and expect a less intense, sweeter, less complex result. Milk chocolate brownies are pleasant and popular with children. The recipe in this post is calibrated for dark chocolate; milk chocolate requires recalibration.
Q: My brownies always have a dry, flaky top rather than the crinkled shiny crust. What went wrong?
The eggs and sugar were not whisked enough before the chocolate was added, or the chocolate was too hot when added (cooking the eggs on contact). Whisk the eggs and sugar vigorously for a full 90 seconds before adding the chocolate. Ensure the chocolate mixture has cooled to warm (not hot) before combining.
Q: Can I make these gluten-free?
Yes - replace the plain flour with 75g of a good gluten-free flour blend or almond flour. Almond flour produces a slightly denser, more intensely nutty brownie that is excellent in its own right. Rice flour-based GF blends produce a result closer to the original.
Q: How do I know if my oven runs hot or cold?
Buy an oven thermometer (£8-10) and check. Most domestic ovens are 10-25°C off their stated temperature, and the variation affects baking times significantly. Knowing your oven's actual temperature removes the guesswork from every recipe in this collection.
🔗 Continue Baking
- Banana Bread: The Science Behind a Perfect Loaf
- Cookie Science: Three Textures, One Recipe
- The Science of Leavening: Yeast, Baking Soda, Baking Powder, Steam
- Tahini: The Sesame Paste That Makes Everything Better
- Miso: Japan's Most Versatile Fermented Ingredient
- Baking From Scratch: The Complete Guide
Latest