Your First Sourdough Starter: A Week-by-Week Guide
There's a jar on my kitchen counter that I've been feeding every day for three years. It bubbles. It smells faintly sour and yeasty. It has helped me bake hundreds of loaves. And it started as nothing more than flour and water.
A sourdough starter is one of the most rewarding things you'll ever make in a kitchen - and one of the most misunderstood. It sounds ancient and mysterious, requiring years of expertise and a perfectly controlled environment. In reality, it's simpler than most people think, and the learning curve flattens quickly once you understand what's actually happening inside that jar.
This week-by-week guide walks you through every stage of creating your first sourdough starter from scratch, what to expect at each point, and how to know when it's ready to bake with.
What Is a Sourdough Starter?
A sourdough starter is a live culture of wild yeast and beneficial bacteria (primarily Lactobacillus species) maintained in a flour-and-water mixture.
The wild yeast leavens bread - just like commercial yeast, but with a more complex, slower-acting character. The bacteria produce lactic and acetic acids, giving sourdough its signature tangy flavor.
Unlike commercial yeast, which comes in a packet and is ready to use immediately, a sourdough starter must be cultivated over 7-14 days, then maintained with regular "feedings" of fresh flour and water.
Once established, a healthy starter can theoretically last forever. Some bakeries claim starters that are decades or even hundreds of years old (the biology checks out - as long as you keep feeding it, the culture perpetuates itself).
Before diving in, make sure you're familiar with the basics covered in our Complete Beginner's Guide to Baking Bread - understanding yeast and fermentation will help everything here make sense.
What You Need
- Whole wheat or rye flour - for initial creation (higher in wild yeast and nutrients than white flour)
- All-purpose or bread flour - for ongoing feeding once established
- Non-chlorinated water - chlorine can inhibit yeast and bacteria. Use filtered water, or leave tap water out for an hour before using
- A clean glass jar - at least 1 quart capacity, with straight sides so you can track rise height
- A rubber band or tape - to mark the level after each feeding and track activity
- A kitchen scale - essential; you're working with baker's percentages here
Tip: Avoid metal bowls or utensils for your starter - extended contact with metal can affect the culture. Glass, plastic, and wood are all fine.
Understanding Baker's Percentages for Feeding
Starter feeding ratios are expressed as starter : flour : water by weight.
The most common beginner ratio: 1:1:1 - equal parts starter, flour, and water.
So if you have 50g of starter, you feed it 50g flour + 50g water, giving you 150g total.
More advanced: 1:5:5 (50g starter + 250g flour + 250g water) - used when you want to slow fermentation or before a big bake to build a large amount.
Start with 1:1:1. You can adjust later.
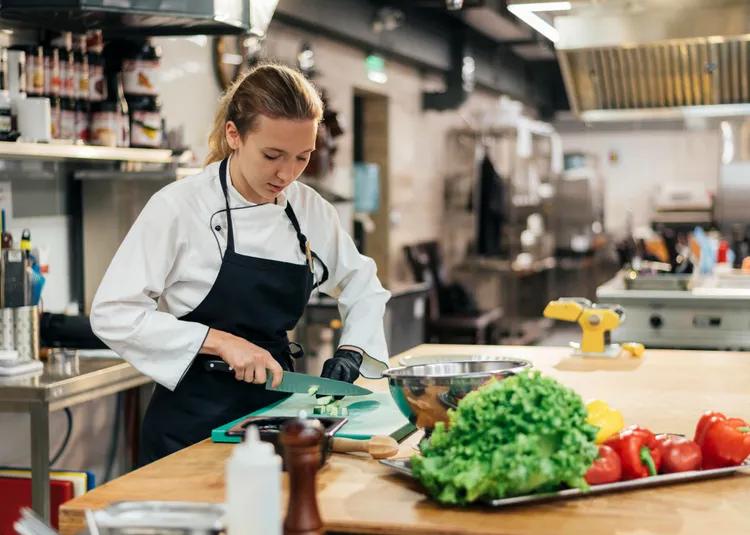
Week 1: Building Your Starter From Scratch
Day 1: The Beginning
What you're doing: Creating the initial mixture that will host your starter's future culture.
In a clean jar, combine:
- 50g whole wheat or rye flour
- 50g non-chlorinated water at room temperature
Stir vigorously to incorporate air. The mixture should look like a thick paste. Mark the level with a rubber band. Cover loosely (not airtight - the culture needs airflow) and leave at room temperature, around 70-75°F (21-24°C).
What to expect: Nothing visible yet. The culture hasn't established.
Day 2: The Wait
What you're doing: Waiting.
Check the jar. You may see tiny bubbles forming, or nothing at all. Both are normal. Don't feed it yet.
What to expect: Possibly very small bubbles, possibly nothing. If there's liquid sitting on top (called "hooch") - grey or darkish liquid - this is just a byproduct of fermentation. Stir it in; it's not a problem.
Day 3: First Signs of Life
What you're doing: Your first discard and feeding.
By now you should see some bubbling activity - small to medium bubbles throughout the mixture, possibly a slight rise. It may smell quite pungent, almost unpleasant - acidic, like cheese or nail polish remover. This is normal and temporary.
Discard all but 50g of your starter. This sounds wasteful, but it's essential: discarding prevents the mixture from becoming too acidic and keeps the flour-to-yeast ratio in balance.
Feed: Add 50g all-purpose flour + 50g water. Stir well, mark the level, cover loosely.
What to expect: Increased activity over the next 24 hours, possibly a small rise.
Common Mistake 1: Skipping the discard because it feels wasteful. Without discard, the acids build up too fast and create an inhospitable environment. The discard is the reset that keeps the culture healthy.
Day 4: Keep Going
What you're doing: Repeat the discard and feeding.
Discard all but 50g. Feed with 50g flour + 50g water. Mark the level.
What to expect: More bubbling, possibly doubling in size. The smell should be shifting - less harsh, more pleasantly yeasty or fruity.
Day 5: Increasing Frequency
What you're doing: Starting twice-daily feedings.
If your starter is showing good activity - rising, bubbling, falling back - switch to feeding twice a day, roughly 12 hours apart.
Morning: discard to 50g, feed 50g flour + 50g water. Evening: same.
What to expect: The starter should be rising and falling predictably. You may notice it peaks a few hours after feeding.
Day 6-7: Building Consistency
What you're doing: Continuing twice-daily feedings, watching for reliable activity.
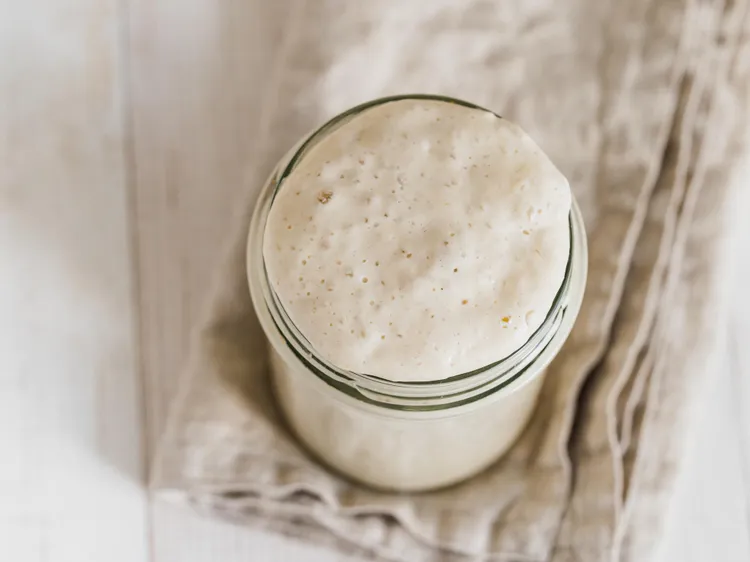
What to expect: By Day 7, a healthy starter will:
- Double or more in size within 4-8 hours of feeding
- Show a domed, slightly convex top at peak activity
- Have a pleasant sour, yeasty smell
- Fall back down after peaking (the "fall" is visible on the jar sides as a "high tide mark")
- Pass the float test: a small spoonful dropped in water should float, indicating enough gas production
If activity is sluggish: Be patient. Cooler kitchens slow everything down. Move the jar somewhere warmer - the top of the fridge, inside an oven with just the light on. Don't add more flour hoping to speed it up.
Week 2: Refining and Testing
Days 8-10: Watch the Peak
By now you're tracking the cycle: feed → rise → peak → fall. Your goal is to use the starter to bake when it's at or just past its peak - when it's doubled, domed, and full of gas.
Continue twice-daily feedings. At each feeding, note:
- How long did it take to peak after the last feeding?
- How high did it rise? (1.5x? 2x? More?)
- What does it smell like at peak? (Pleasantly sour and yeasty, with a slight fruity or yogurt note = healthy)
Days 11-14: The Float Test and First Bake
The float test: Drop a small spoonful (about ½ teaspoon) of your starter into a glass of water. If it floats, the culture is producing enough gas to leaven bread. If it sinks, give it a few more days of consistent feeding.
The doubling test: After feeding, mark the level and check when (and whether) it doubles. Consistent doubling within 4-8 hours at room temperature means your starter is ready.
When both tests pass consistently on two consecutive feedings - congratulations. Your starter is alive, active, and ready to bake with.
How to Maintain Your Starter Long-Term
Daily Bakers (Room Temperature)
Feed once or twice daily. Keep at room temperature. Use in bread recipes regularly.
Weekly Bakers (Refrigerator Storage)
Store your starter in the fridge between bakes. Cold dramatically slows fermentation - you only need to feed it once a week.
When you want to bake:
- Remove from fridge and feed (discard to 50g, add 50g flour + 50g water)
- Let it sit at room temperature for 4-8 hours until active and bubbly
- Feed again, wait for peak (4-8 hours)
- Use at peak for baking
After baking, return unused starter to the fridge.
What's the "Discard"?
Every feeding, you remove most of the starter before feeding the remainder. That removed portion is called discard - and it's perfectly usable.
Fresh discard (used same day or within a week, kept in the fridge) adds sourdough flavor and leavening to:
- Pancakes and waffles
- Pizza dough
- Crackers
- Banana bread and quick breads
- Flatbreads (see our Simple 4-Ingredient Flatbread recipe for a starting point)
You never need to waste it.
Troubleshooting Your Starter
Starter isn't rising: Room too cold, chlorinated water, or the culture just needs more time. Move somewhere warmer, switch to filtered water, and be patient.
Liquid (hooch) on top: The starter is hungry - feed it. Grey liquid is normal; pink or orange liquid means contamination. If you see pink or orange, discard everything and start fresh.
Mold (fuzzy growth): Discard everything and start over. This is rare and usually caused by using a dirty jar or covering too tightly.
Smells like acetone or nail polish remover: The culture is producing too much acetic acid - it's hungry. Increase feeding frequency.
Starter is very sour but not rising well: Over-fermented. Discard more aggressively (keep only 10-20g) and feed with a higher ratio - try 1:5:5 for a day or two to dilute the acidity.
Common Mistakes With Sourdough Starters
Mistake 1: Using chlorinated tap water. Chlorine is added to tap water specifically to kill microorganisms - which is excellent for drinking water and terrible for sourdough. Use filtered water or let tap water sit uncovered for an hour before using.
Mistake 2: Giving up too early. Starters in their first week often look alarming - very bubbly one day, completely flat the next. Wild yeast populations fluctuate as different species compete for dominance. The second week almost always shows more consistent, reliable activity. Day 10 is not Day 4.
Frequently Asked Questions
Q: How do I know if my starter has failed? Pink, orange, or red discoloration means contamination - start over. No activity after 14 days with consistent feeding in a warm environment also suggests something is wrong (usually water quality or temperature). Otherwise, sluggish activity just means more time.
Q: Can I name my starter? You absolutely should. It's tradition. Mine is named Gerald. Naming it makes you more likely to feed it consistently, which makes it healthier. That's not scientifically proven, but it feels true.
Q: What flour is best for maintaining a starter? Bread flour or all-purpose for the base, with a small addition (10-20%) of whole wheat or rye to boost nutrition. Whole grain flours contain more wild yeast and minerals that keep the culture vigorous.
Q: Does the starter container size matter? Use a jar at least 3x the volume of your fed starter. If you're keeping 150g of starter after feeding, use at least a 16-oz (500ml) jar so it has room to rise without overflowing.
Q: How long before I can bake sourdough bread? Most starters are ready between Day 10 and Day 14, though some take up to 3 weeks in cooler kitchens or with lower-activity flours. Don't rush it - a fully active starter produces dramatically better bread than a marginally active one.
Your Starter Is the Beginning
Growing a sourdough starter is a commitment - a small, daily one - but it's also the beginning of the most rewarding kind of bread baking. Sourdough connects you to a living culture, teaches you to read fermentation in a way commercial yeast can't, and produces bread with flavor and texture you simply can't replicate any other way.
Once your starter is consistently doubling and passing the float test, you're ready to bake your first sourdough loaf. Start with the fundamentals in our Complete Beginner's Guide to Baking Bread - the principles of shaping, scoring, and baking apply directly.
More from the Beginner's Bread Series:
Latest