Fermentation Equipment Guide: Everything You Need (and Nothing You Don't)
A jar, a scale, and salt. That is enough to start. Everything else is useful in specific situations - here is exactly which situations.
The fermentation equipment market has expanded dramatically alongside the gut health trend. Walk into a specialist kitchen store or browse online and you will find dedicated fermentation crocks, airlocked mason jar lids, ceramic weights, pH meters, temperature-controlled incubators, and starter culture kits - a complete category of products marketed at the home fermenter.
Some of it is genuinely useful. Some of it is useful once you're fermenting regularly and want to upgrade your setup. And some of it is a solution to a problem you don't actually have.
This guide makes the distinction clearly. It covers every piece of equipment that appears in the Fermentation & Gut Health at Home collection - what it does, when you need it, when you can improvise, and what to buy if you do invest. The goal is to help you start fermenting with what you already own, and to invest in equipment only when a specific recipe or situation genuinely calls for it.
📖 Read the Fermentation Safety Guide before making your first ferment. Understanding what safe fermentation looks like is more important than any piece of equipment.
The Minimum Viable Fermentation Kit
You can begin fermenting today with four things that most kitchens already contain or that cost under £15 to acquire:
1. A glass jar with a lid - a standard 1-litre mason jar (Kilner, Ball, or Weck) 2. A digital kitchen scale - any scale that measures to 1g accuracy 3. Non-iodised salt - sea salt, kosher salt, or pickling salt (not iodised table salt) 4. Clean hands and a clean work surface
With these four things, you can make sauerkraut, kimchi, lacto-fermented vegetables, and most of the recipes in this collection. Everything described below is an upgrade - useful, sometimes significantly so, but not required to begin.
Part 1: The Vessels
Glass Mason Jars
The workhorse of home fermentation. Wide-mouth mason jars in 500ml, 1-litre, and 2-litre sizes handle the majority of recipes in this collection.
Why glass over other materials:
- Non-reactive - the lactic acid produced during fermentation doesn't interact with glass the way it can with some plastics
- Transparent - you can observe the ferment without opening it
- Easy to clean thoroughly
- Reusable indefinitely
The sizes you need:
- 500ml: Small batch ferments, quick ferments (labneh, water kefir second fermentation), experimental batches
- 1-litre: The standard size for most recipes - sauerkraut, kimchi in smaller quantities, hot sauce, milk kefir
- 2-litre: A full head of kimchi, large-batch sauerkraut, water kefir first fermentation
Brands: Kilner (UK, widely available), Ball (US, widely available), Weck (German, the most aesthetically pleasing, with glass lids). All are excellent. Buy whatever is locally available and affordable.
The lid question: Standard mason jar lids (metal screw-top lids) work well for most ferments. They are not airtight when screwed on loosely - which is actually useful during active fermentation, when CO2 needs to escape. For ferments that produce a lot of CO2 (very active kimchi, hot sauce during peak fermentation), "burp" the jar daily - unscrew the lid slightly to release pressure, then re-tighten. See the airlock section for the upgrade option.
Cost: £8–15 for a set of 4 × 1-litre jars.
Fermentation Crocks
Traditional ceramic or stoneware crocks - the vessels in which sauerkraut, kimchi, and other vegetable ferments have been made for centuries. They range from simple open crocks to sophisticated water-sealed crocks where a water-filled channel around the rim creates an airlock effect.
The genuine advantages of a good crock:
- Large capacity - 3-10 litre crocks handle bulk fermentation efficiently
- The water seal allows CO2 to escape without oxygen entering - no need to burp daily
- Ceramic maintains temperature more consistently than glass in fluctuating environments
- The aesthetic is genuinely lovely
When a crock is worth buying:
- You are fermenting regularly and want to make large batches
- You want to make traditional sauerkraut or kimchi in significant quantities (multiple kilograms at a time)
- You are making long-duration ferments (6+ months) where consistent conditions matter
When a crock is not worth buying:
- You are just starting out
- You make small batches occasionally
- You are unsure how much you will ferment
Cost: £25-50 for a quality 3-litre water-sealed crock. Invest once you know fermentation is a regular practice.
Swing-Top (Grolsch-Style) Bottles
For carbonated second fermentations - water kefir, kombucha, kvass, any fizzy fermented drink. The swing-top lid creates a seal that traps CO2 during the second fermentation, producing natural carbonation in the bottle.
Essential for: Water kefir second fermentation, any bottled fermented drink where carbonation is the goal.
Not suitable for: Long-duration ferments or any ferment where ongoing gas release is needed - the sealed bottle would build dangerous pressure. Use only for short second fermentations (24-48 hours) with careful monitoring.
Cost: £8-15 for a pack of 4 × 500ml swing-top bottles.
Part 2: The Tools
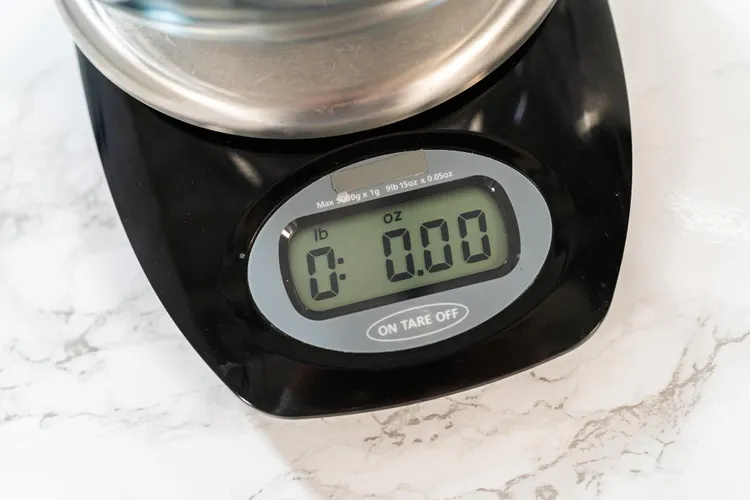
Digital Kitchen Scale
The single most important piece of equipment in the fermentation kit - more important than any specialist fermentation product.
Salt ratios in fermentation are precise and matter significantly. The difference between 18g and 24g of salt in a 1kg batch of vegetables is the difference between a ferment that works reliably and one that is either too salty (inhibiting the LAB you need) or under-salted (allowing unwanted bacteria to compete). Measuring salt by the teaspoon or tablespoon introduces enough variability to produce inconsistent results.
What to buy: Any digital kitchen scale that measures to 1g accuracy and has a tare function. This describes almost every kitchen scale currently available. No need to buy anything specifically designed for fermentation.
Cost: £8-20. The most impactful £10 you will spend on your fermentation practice.
Fermentation Weights
Fermentation weights are small glass or ceramic discs or cylinders designed to fit inside mason jars and hold vegetables below the brine line. Submerged vegetables ferment; vegetables above the brine develop mould. The weight solves the submersion problem without daily monitoring.
The genuine problem they solve: Vegetables - particularly sauerkraut and kimchi - are buoyant. They float upward in the brine over time, especially as fermentation produces gas that gets trapped in the vegetable tissue. Without a weight, the vegetables regularly breach the brine surface and become exposed to oxygen.
DIY alternatives that work equally well:
- A small zip-lock bag filled with brine (use brine from the ferment, not plain water - if the bag leaks, it won't dilute the salt concentration), placed on top of the vegetables
- A smaller glass jar filled with water, placed on top of the vegetables and inside the larger jar
- A folded piece of cabbage leaf, wedged against the jar walls to hold the vegetables down (traditional and effective)
When dedicated weights are worth buying: When you ferment regularly and want a clean, reusable solution. Glass weights that fit standard mason jars are excellent and last indefinitely.
Cost: £8-15 for a set of glass fermentation weights.
Airlocks and Airlock Lids
An airlock is a one-way valve that allows CO2 (produced during fermentation) to escape from a jar without allowing oxygen to enter. It is the piece of equipment most associated with "proper" fermentation - and the one most overemphasised for beginners.
The genuine advantage: For very active ferments (kimchi in summer, hot sauce at peak fermentation) that produce significant CO2, an airlock eliminates the need to burp jars daily and reduces the risk of accidentally building enough pressure to cause a seal issue. For long-duration ferments (miso, longer vegetable ferments), airlocks reduce oxygen exposure and the associated risk of surface growth.
When you genuinely need an airlock:
- Active kimchi fermentation in warm weather (above 22°C)
- Any ferment you want to leave unattended for more than a day during peak activity
- Miso and other long-duration ferments in sealed vessels
When you don't need an airlock:
- Sauerkraut (traditionally made with no airlock - a cloth cover is sufficient)
- Yogurt, kefir, labneh (dairy ferments that don't produce significant CO2)
- Sourdough starter (needs air access, not an airlock)
- Any ferment you're burping daily anyway
The practical alternative to buying airlocks: Simply loosen the lid slightly - not enough to let debris in, but enough to let CO2 escape. This is how every fermenter before the modern era managed it.
Cost: £5-12 for a set of airlock lids that fit standard mason jars. Only buy if you're fermenting actively and want to reduce daily monitoring.
Muslin Cloth / Cheesecloth
Essential for two specific applications:
Straining yogurt for labneh: Labneh requires hanging yogurt in cloth for 24-48 hours to drain whey. Muslin cloth allows the whey to drain while the solids remain. A fine-mesh strainer lined with cloth works; a proper muslin bag is cleaner.
Covering sourdough starter: The starter needs to breathe (it's an active culture) but needs protection from debris. A piece of muslin secured with a rubber band is the standard cover.
Alternative: A clean tea towel for straining; cling film loosely covering the starter (with a small gap for gas escape) works adequately if muslin is unavailable.
Cost: £3-8 for a metre of muslin from fabric stores or kitchen suppliers.
Thermometer
Temperature is one of the most important variables in fermentation. Specific recipes require specific temperature ranges:
| Recipe | Critical Temperature | Why |
|---|---|---|
| Yogurt incubation | 40-45°C | Below 40°C: bacteria inactive; above 45°C: bacteria die |
| Amazake saccharification | 55-60°C | Koji enzymes work in this narrow range |
| Milk kefir | 20-25°C (room temp) | Not critical but faster at the right temperature |
| Sourdough starter | 21-26°C (room temp) | Warmer = faster; adjust accordingly |
| Vegetable ferments | 18-24°C (room temp) | Wide range is acceptable |
Essential for: Yogurt (non-negotiable - the temperature must be right for the cultures to set), amazake (the narrow temperature window requires monitoring).
Useful for: All ferments where you want to understand and control the timeline.
Cost: £8-25 for a reliable instant-read digital thermometer. Already covered in the Global Street Food collection where it is essential for frying - the same thermometer serves both purposes.
pH Strips
pH strips for fermentation measure the acidity of the brine - the objective confirmation that a ferment has acidified to the safe level (pH 4.6 or below).
Essential for: Nobody who is following the recipes in this collection needs pH strips to be safe - proper salt ratios and good technique make safe fermentation reliable without them. They are useful for:
- Peace of mind during early fermentation practice
- Troubleshooting a ferment that doesn't seem to be progressing normally
- The more analytically-minded home fermenter who wants objective data
Cost: £5-10 for a pack of 100 strips. A worthwhile investment for beginners who want objective confirmation of safety.
Spice Grinder or Mortar and Pestle
For the Chaat Masala and fermented hot sauce preparations that involve whole spices. Not fermentation-specific but useful across the broader cooking collection.
Part 3: The Ingredients That Are Also Equipment
Non-Iodised Salt
Salt is both an ingredient and the functional mechanism of fermentation. The specific type matters:
Use: Sea salt, kosher salt, or pickling/canning salt - any non-iodised variety.
Do not use: Standard table salt with added iodine. Iodine is added to table salt as a public health measure to prevent iodine deficiency. It is also a microbiocide - it inhibits the lactic acid bacteria that power lacto-fermentation. Even small amounts of iodised salt can significantly slow or prevent fermentation.
The test: Look at the ingredients list on the salt packet. If it says "iodine" or "potassium iodide," it is iodised. If the ingredients list is just "salt" or "sea salt" with no other additions, it is suitable for fermentation.
Cost: Non-iodised sea salt or kosher salt is widely available and no more expensive than iodised table salt.
Filtered or De-chlorinated Water
Tap water in most urban areas contains chlorine (or chloramine) as a disinfectant. Chlorine inhibits LAB in the same way iodine does - it is a biocide that doesn't distinguish between beneficial bacteria and harmful ones.
For short ferments (under 1 week): The chlorine in standard tap water is usually insufficient to significantly impact a well-salted ferment. Most home fermenters use tap water without problems.
For longer or more sensitive ferments (miso, sourdough starter, longer vegetable ferments): Filter the water through a standard Brita-style filter, or leave tap water to stand uncovered for 30 minutes - most of the chlorine will dissipate.
Chloramine (used in some municipal water supplies) does not dissipate on standing and requires active filtration or the use of a Campden tablet (a sulfite used in home brewing) to neutralise. If you suspect chloramine in your water supply and find fermentation consistently sluggish, this is worth investigating.
Part 4: The Specialist Equipment by Recipe
| Recipe | Essential | Useful | Can Improvise |
|---|---|---|---|
| Sauerkraut | Jar, scale, non-iodised salt | Weight, airlock | Zip-lock bag as weight |
| Kimchi | Jar, scale, non-iodised salt | Weight, airlock | As sauerkraut |
| Yogurt | Thermometer, wide vessel | Yogurt maker, incubator | Oven with light on, thermos |
| Labneh | Muslin, strainer | Labneh bag | Tea towel |
| Kefir (milk) | Jar, strainer | — | Tea strainer |
| Water kefir | Jar, swing-top bottles | — | Loosely-lidded bottle |
| Sourdough starter | Jar, scale | Banneton, lame | Any bowl |
| Miso | Large crock or container, weight | Airlock, pH strips | Heavy stone as weight |
| Fermented hot sauce | Jar, blender | Airlock, pH strips | As sauerkraut |
| Amazake | Thermometer, insulated container | Rice cooker, dehydrator | Thermos, oven at low heat |
| Kvass | Large jar, swing-top bottles | — | Loosely-lidded bottles |
The Recommended Starter Kit
If you are starting from scratch and want to buy everything useful in one go, here is the complete recommended kit:
Essential (under £30 total):
- 4 × 1-litre wide-mouth mason jars - £12
- Digital kitchen scale (to 1g) - £10
- Non-iodised sea salt - £3
- Instant-read thermometer - £12
Upgrade when you ferment regularly (under £40 total):
- Fermentation weights (glass, set of 4) - £12
- Airlock lids for mason jars (set of 4) - £10
- Muslin cloth (1 metre) - £5
- pH strips - £8
- 4 × swing-top bottles (500ml) - £12
Invest in if fermentation becomes a regular practice:
- 3-litre water-sealed fermentation crock - £35-50
- Yogurt maker or temperature-controlled incubator - £20-40
- Additional large jars (2-litre) - £15
Total to start well: Under £35. Total for a comprehensive setup: under £90. Neither requires specialist fermentation retailers - most items are available in kitchen shops, supermarkets, and online.
What Not to Buy
Dedicated vegetable fermentation kits: These typically include a mason jar, a weight, and an airlock lid - sold together at a significant premium over buying the components separately. The components are all useful; the kit format adds cost without adding value.
Electric fermentation chambers: Temperature-controlled boxes designed to maintain fermentation at a precise temperature. Useful for very advanced practice or in climates with significant temperature variation. Not necessary for any recipe in this collection - a consistently warm kitchen corner works.
Pre-made brine sachets: Salt dissolved in water at the right ratio, sold in single-use packets. The convenience cost is significant. Weigh your salt; make your own brine.
Ceramic crocks marketed as "authentic": A quality water-sealed ceramic crock is a genuinely useful piece of equipment - but it does not need to be marketed as authentic or traditional to be excellent. The function matters; the marketing does not.
Pro Tips
- Buy glass weights before airlocks. The submersion problem (vegetables floating above the brine) is more common and more impactful than the CO2 management problem. Weights first; airlocks later.
- Wide-mouth jars over regular-mouth. Packing vegetables into a regular-mouth jar is frustrating. Wide-mouth jars allow easy packing, easy retrieval of the ferment, and easy cleaning. Always wide-mouth.
- The thermometer earns its cost immediately. In the first batch of yogurt alone, a thermometer saves the wasted milk, cultures, and time of a failed set due to incorrect incubation temperature.
- Label every jar. Date started, contents, salt percentage, expected completion. A piece of masking tape and a marker costs nothing and saves constant re-identification of what's in each jar.
- Start with one jar, one recipe. The temptation when starting fermentation is to begin six ferments simultaneously. One successful sauerkraut teaches more than six simultaneous uncertain results.
FAQ
Q: Do I need to sterilise my jars?
No - washing with hot soapy water and rinsing thoroughly is sufficient. Sterilisation (boiling or using a sanitiser) is required for canning/preserving, where you are trying to eliminate all bacteria to create a shelf-stable product. In fermentation, you are cultivating bacteria - you want a clean environment, not a sterile one. Sterilisation is unnecessary and can remove the background LAB that contribute to fermentation.
Q: Can I use plastic containers for fermentation?
Food-grade plastic (clearly labeled, BPA-free) is acceptable for short ferments. For long ferments (weeks or months), glass or ceramic is strongly preferred - the acids produced during fermentation can interact with some plastics over time, and plastic is harder to clean thoroughly and inspect visually. If plastic is your only option, use it - but transition to glass when possible.
Q: Do I need an airlock?
For most ferments in this collection: no. Loosening the lid daily to release CO2 pressure (known as "burping" the jar) works perfectly well for vegetable ferments. Airlocks are genuinely useful for very active ferments that produce large amounts of CO2, or for ferments you want to leave unmonitored. Start without them; add them if you find you need them.
Q: My fermentation weight doesn't fit my jar. What should I use instead?
A small zip-lock bag filled with brine from the ferment (important - use brine, not plain water, so if the bag leaks it doesn't dilute the ferment). Fill it enough to be heavy without being so full it can't fit in the jar. Press it down over the vegetables. It works as well as a dedicated weight and costs nothing.
Q: Is a yogurt maker worth buying?
If you plan to make yogurt regularly (more than once a week), yes. A yogurt maker maintains a consistent 40-43°C for the incubation period without any monitoring. Without one, alternatives include: an oven with just the light on (approximately 35-40°C in most ovens), a thermos flask pre-warmed with hot water, a warm spot near a radiator, or wrapping the jar in towels and leaving in the warmest part of the kitchen. All work; the yogurt maker is simply more consistent and requires less improvisation.
🔗 Start Fermenting
- Fermentation Safety: The Complete Guide to What's Safe and What's Not
- The Science of Fermentation: What's Actually Happening in Your Jar
- Sauerkraut: The Easiest Ferment You'll Ever Make - start here
- How to Make Kimchi: The Complete Beginner's Guide
- Yogurt from Scratch: Better Than Any Shop-Bought Version
- Fermentation & Gut Health at Home: The Ultimate Guide
Latest